Category: Uncategorized

  • Five Steps to Setting the Perfect Thanksgiving Table: Beautiful, Functional, and Heart-Centered

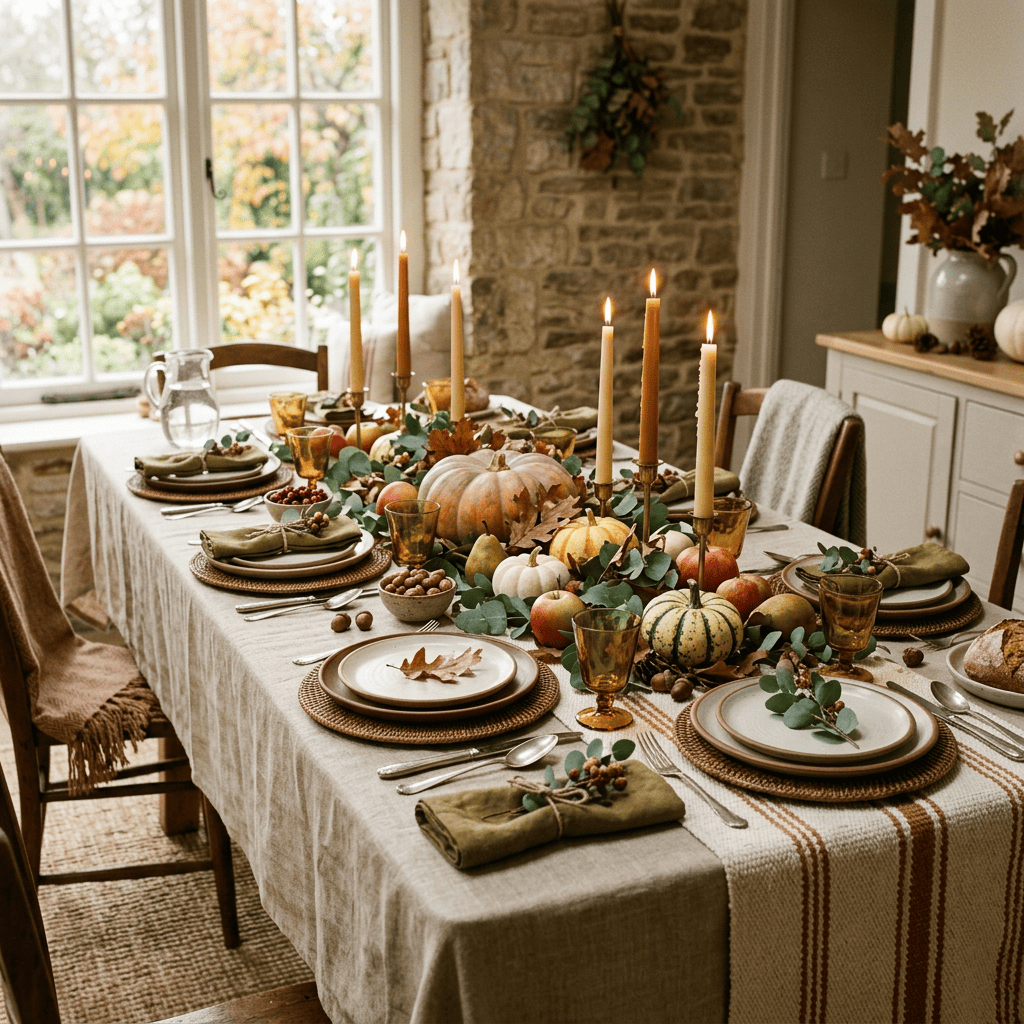
    Autumn dining table with pumpkins, candles, fruit, and rustic place settings

    Thanksgiving is more than just a meal; it is a dedicated moment to pause, reflect, and gather with the people who matter most. In a fast-paced world, the holiday table becomes a sanctuary for connection, tradition, and shared joy.

    Creating the perfect tablescape is not about flawless perfection or expensive crystal. It is about intentionally blending beauty, health, and functionality while fostering an environment of gratitude and fun. By choosing mindfully crafted, sustainable decor and focusing on your family’s well-being, you can set a table that nourishes both the body and the soul.

    Here are five simple steps to setting a healthy, beautiful, and heart-centered Thanksgiving table.

    Keep reading–Don’t miss out on the bonus section below: Healthier Fruit and Vegetable Side Dish Recipes

    **Readers also like reading these related posts: “8 Cozy Family Fall Traditions to Start This Autumn Season” and “The Perfect Fall Reset: 6 Ways to Gently Transition Into Autumn Without Feeling Overwhelmed”


    1. Start with a Healthy Foundation
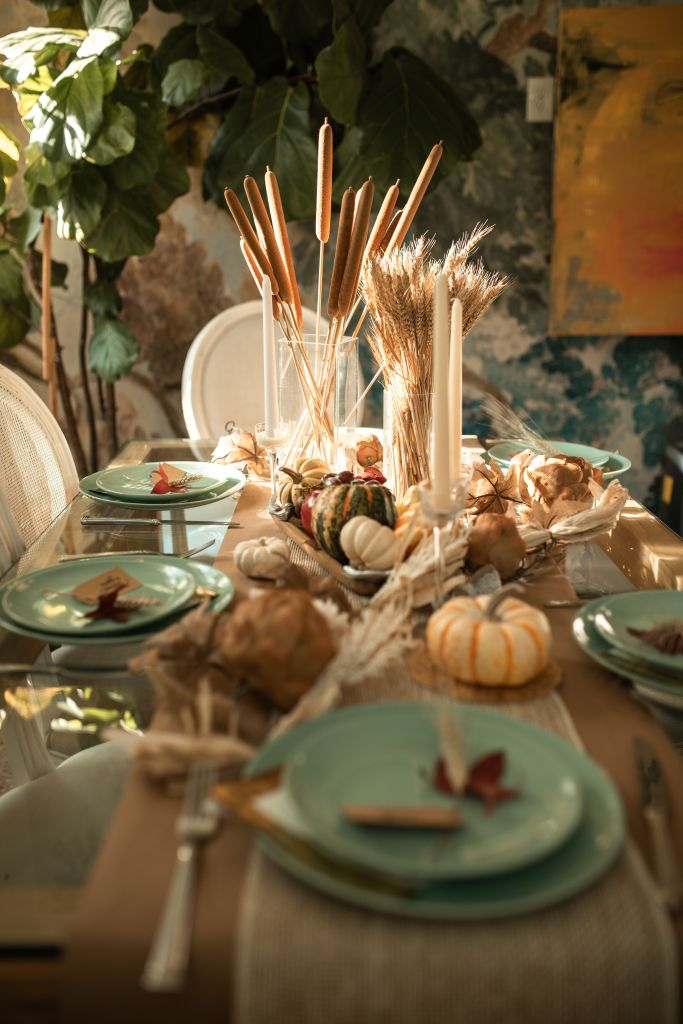
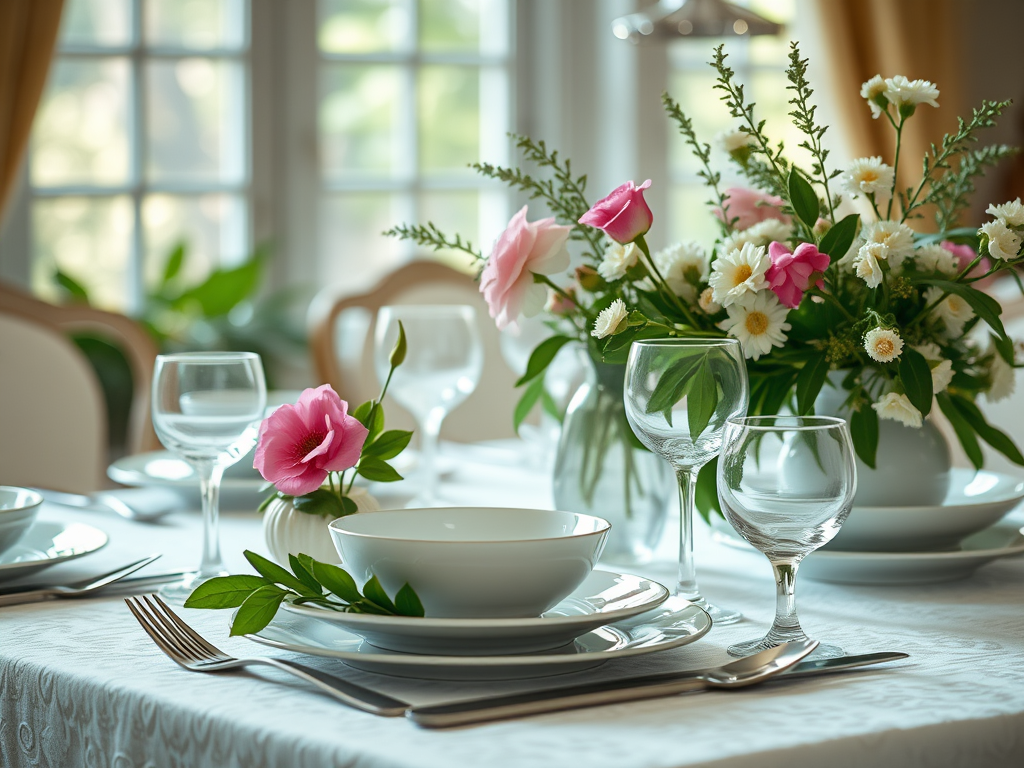
    A beautiful table begins with what you place closest to your food and your family. Opt for lead free ceramic dishes, borosilicate glass drinkware, and natural fabric sustainable linens to create a warm and inviting base. Look for unbleached organic cotton, raw linen, or hemp tablecloths and napkins. These materials are free from harsh chemical treatments, biodegrade naturally, and offer a rich, tactile texture that elevates the room.

    To add warmth and depth, layer your foundation with a reclaimed wood table runner or hand-woven seagrass placemats. Embracing natural textures brings a grounding, earthy energy into your dining room, setting a calm tone for the afternoon ahead.

    My favorite Fall Tablescape Decor Storefront Here

    *Disclosure: As an Amazon Associate, I earn from qualifying purchases. This means that if you click on a link and make a purchase, I may receive a small commission at no additional cost to you. I only recommend products I genuinely love, use, or believe will add value to your home and wellness journey. Thank you for supporting my work! 


    2. Design for Function and Flow
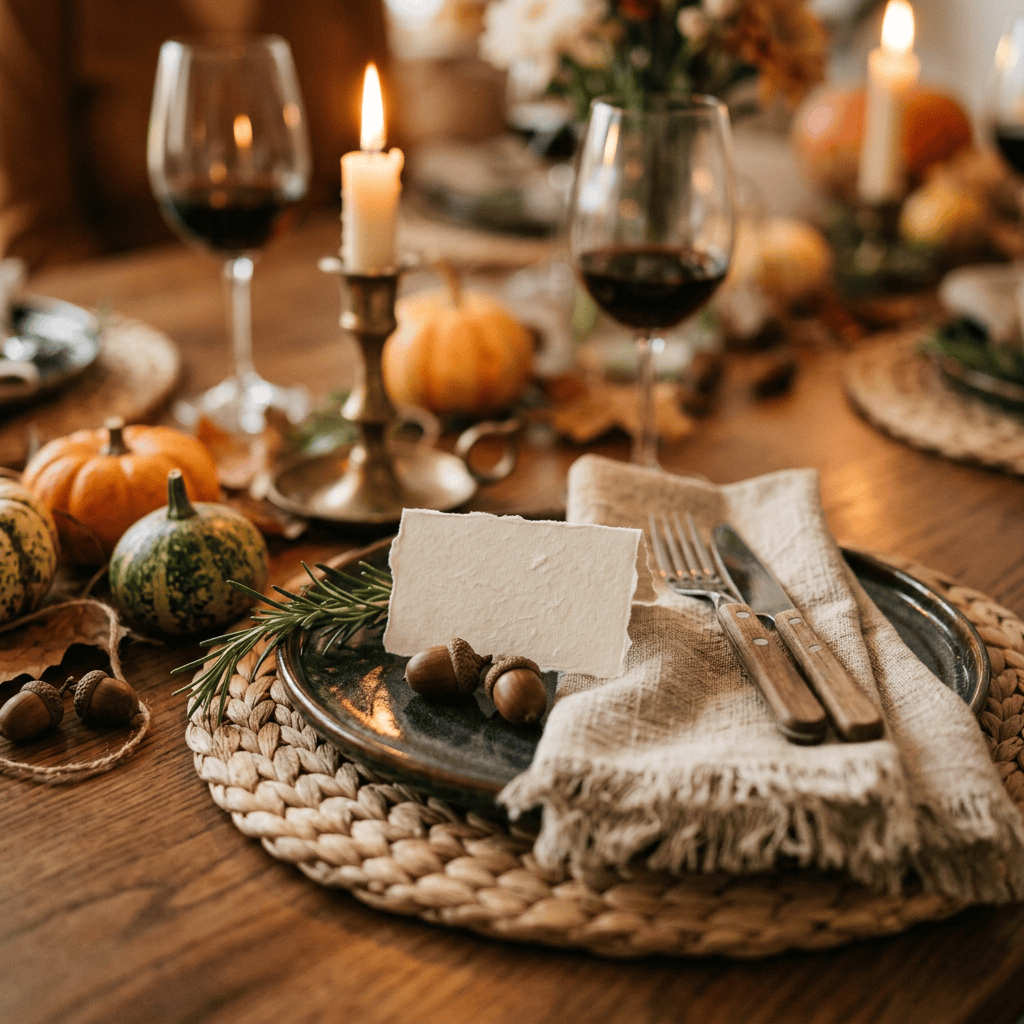
    Autumn dinner table with candles, red wine, pumpkins, acorns, and rustic place setting

    A table can only be beautiful if it is comfortable to sit at. When planning your layout, prioritize the comfort of your guests and the flow of the meal.

    • Keep centerpieces low: Ensure all floral arrangements and decor elements sit below eye level—generally under 12 inches tall. This allows conversation to flow across the table without guests straining to see one another through forest-like table greenery.
    • Ditch the Plastic Rings: Fold your natural linen napkins loosely and tie them with a piece of biodegradable jute twine. Tuck a small sprig of fresh rosemary or a single dried flower into the twine for a beautiful, organic touch.
    • Embrace Imperfection: Do not worry if your heirloom plates do not match perfectly. Mixing and matching complementary, earthy ceramic textures creates a warm, “collected-over-time” feel that makes a home feel incredibly inviting.
    • Leave breathing room: Give each place setting enough space (as best as you can) so guests do not feel crowded while eating.
    • No assigned seating: Avoid conflicts by allowing your guests to naturally flow to a seat location. Instead of having a “kids table,” I try my best to make sure everyone is included at the main table. (even if the table expands into the living room) This ensures no one feels isolated or left out.
    • Create a beverage station: To keep the main table organized and clutter-free, set up a separate side table or bar cart for water pitchers, wine, and clean glasses. This makes it easy for guests to help themselves without disrupting the main dining space.

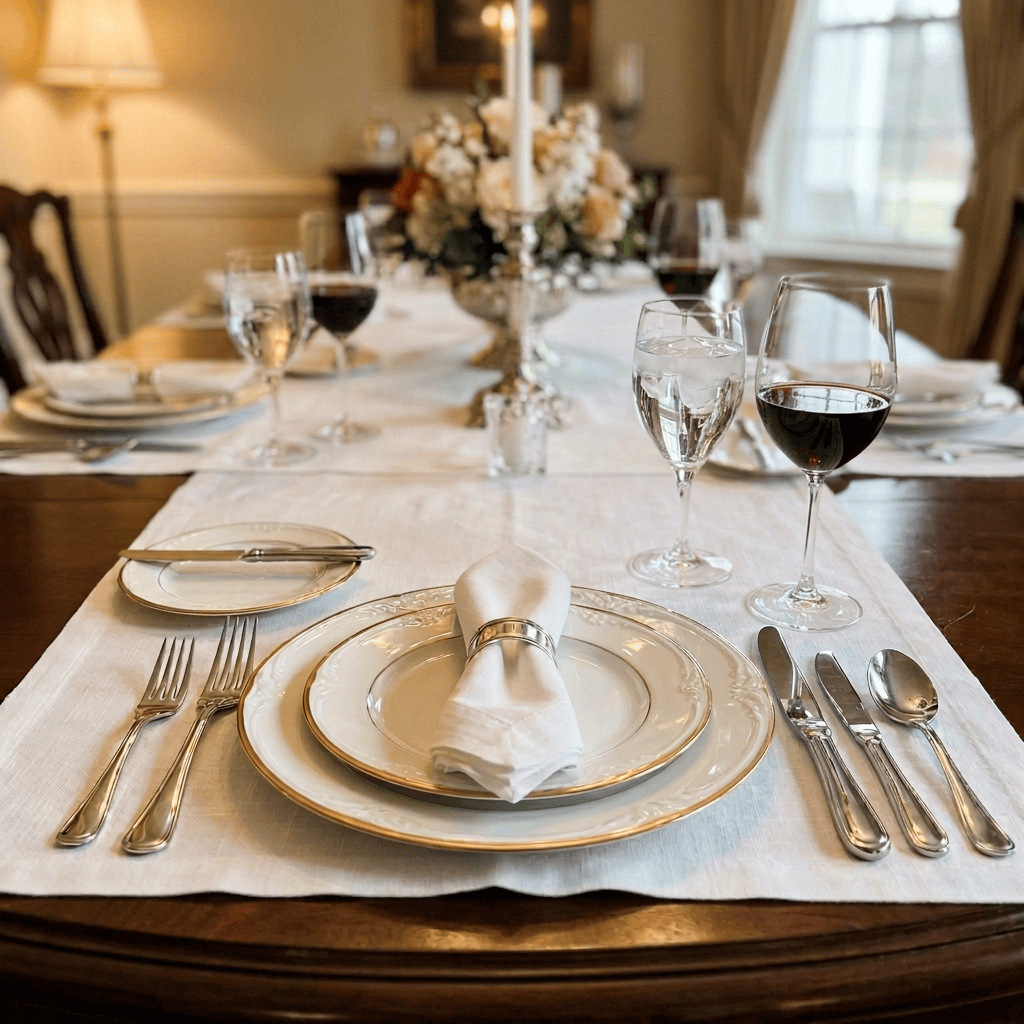
    Step-by-Step Anatomy of a Place Setting

    • The Center: Place the Dinner Plate directly in front of the chair, about one inch from the edge of the table. If you are serving a salad course first, center the smaller Salad Plate right on top of the dinner plate.
    • The Left Side (Forks): Place the Dinner Fork to the immediate left of the plate. If you are serving a first-course salad, place the Salad Fork to the left of the dinner fork (on the far outside).
    • The Right Side (Knife & Spoon): Place the Dinner Knife to the immediate right of the plate. Crucial detail: The cutting edge of the blade must always face toward the plate. Place the Soup/Dinner Spoon to the right of the knife.
    • The Napkin: Traditionally, the napkin goes to the far left, underneath the forks. However, for a more modern, styled family table, folding it into a neat rectangle and placing it directly on top of the empty plates looks beautiful and saves valuable table space.
    • The Top Right (Glasses): Place the Water Glass just above the dinner knife. If you are serving wine or cider, place that glass slightly to the right and below the water glass.
    Elegant dining table with place settings, wine glasses, flowers, and candles

    3. Bring the Outdoors In

    Autumn arrangement with pumpkins, leaves, berries, pinecones, and candle

    Celebrate the abundance of the season by using live, organic decor. Foraging for your centerpiece is a wonderful, grounding tradition that connects your home to the rhythm of nature.

    Take a walk through your backyard or local market to gather vibrant elements:

    • Branches of eucalyptus, rosemary, or olive leaves for a fragrant, air-purifying runner.
    • Heirloom pumpkins, gourds, and squash in muted whites, greens, and soft oranges.
    • Bowls of crisp apples, pomegranates, and unshelled walnuts to add color and life.
    • Pinecones, or dried grasses

    For lighting, skip synthetic scented candles, which can release toxins into the air and compete with the delicious aromas of your meal. Instead, opt for 100% beeswax or soy taper candles. They cast a warm, golden glow, clean the air naturally, and create a cozy, intimate ambiance.

    My favorite Fall Tablescape Decor Storefront Here


    4. Weave in Tradition and Gratitude

    Illustrated autumn dinner table with candles, pumpkins, fruit, and four place settings

    The items on your table should tell a story. Incorporating family heirlooms—like your grandmother’s vintage glassware, a hand-carved serving bowl, or mismatched antique silverware—adds layers of meaning and sparks nostalgic storytelling across generations.

    To cultivate a true spirit of gratitude, build interactive prompts into your place settings. Place a small piece of recycled paper and a wooden pencil at each seat, asking guests to write down three things they are grateful for this year. Before dessert, pass a basket around to collect the notes, and take turns reading them aloud. This simple practice shifts the focus of the day from commercialism to deep, heartfelt appreciation.


    5. Add a Touch of Family Fun
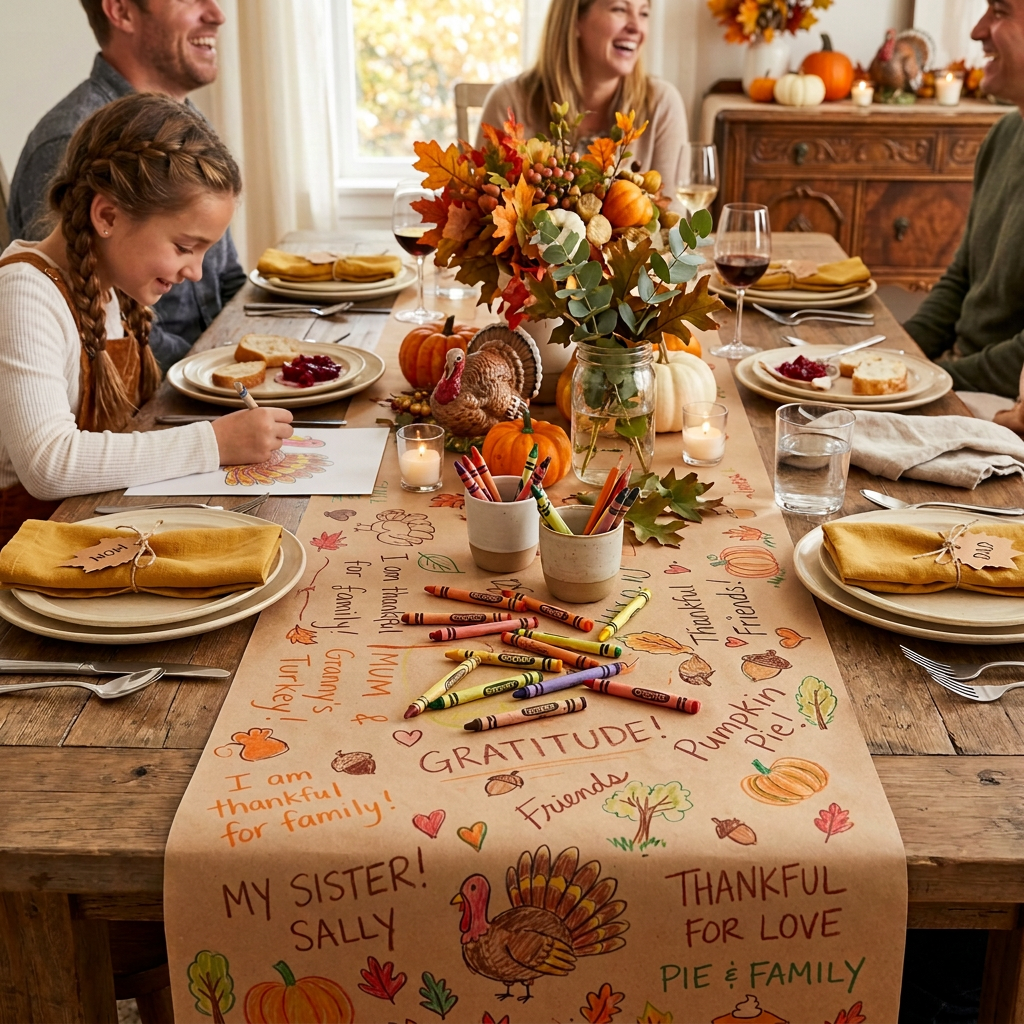
    Family at Thanksgiving table with runner reading “Gratitude,” “Thankful for love,” and “Pie & family.”

    While Thanksgiving honors deep traditions, it should also be filled with laughter and play. Keeping the atmosphere light ensures that children and adults alike feel relaxed and connected.

    Consider adding these fun, interactive elements to your table:

    • Custom butcher paper runner: Cover the children’s section of the table (or the entire table) in brown butcher paper. Scatter bowls of non-toxic soy crayons and challenge everyone to draw what they are thankful for directly onto the table.
    • Table conversation starters: Place a unique question card under each dinner plate. Questions like, “What is your favorite family memory from this year?” or “If you could travel back to any Thanksgiving in history, which one would it be?” ensure that everyone gets a chance to share and laugh together.
    • The “Gratitude Roll” Dice Game: Place a set of dice in the center of the table. A guest rolls a single die. The number they land on corresponds to a prompt on a small chalkboard nearby (e.g., 1 = Name a person you’re thankful for, 2 = Name a place they love, 3 = Name a favorite memory, 4 = Name something they learned this year, 5 = Name something that makes them smile, 6 = Name something they want to do again). It keeps the conversation flowing dynamically between courses and turns sharing into a lighthearted game.
    • The “How Many” Guessing Jar: Fill a glass mason jar with a festive, bulk-bought item like dried corn kernels, acorns, whole cranberries, or pecans, and place it on the table. Leave a stack of scrap paper nearby for guests to slip in their name and their best guess of the exact count. Announce the winner during dessert, and the prize can be a small reward—like getting to pack the first container of leftovers or choosing the family board game for later that night.
    • The Festive Photo Challenge Card: To gently keep everyone off social media while still capturing memories, place a small, printable card at each setting with a “Holiday Photo Scavenger Hunt.” Give prompts like: “Take a photo of the oldest and youngest person laughing together,” or “Snap a picture of the messy kitchen prep.” This turns memory-catching into an active, fun challenge that focuses entirely on real-time family connection. Everyone shares the photos with each other later!

    **Bonus: Healthier Fruit and Vegetable Side Dish Recipes

    1. Stuffed Honeynut Squash with Wild Rice, Cranberries, and Pecans

    Two roasted squash halves filled with wild rice, cranberries, pecans, and herbs

    Honeynut squash looks like a mini butternut squash but features a sweeter, richer flavor and a skin so tender you can eat it. This dish makes a stunning, colorful centerpiece for each plate.

    • The Base: Honeynut or small acorn squash, halved and roasted with a touch of olive oil, pure maple syrup, and a pinch of sea salt.
    • The Filling: A hearty blend of chewy wild rice, sautéed shallots, and celery.
    • The Flavor Boost: Stir in tart dried cranberries, toasted pecans for crunch, and fresh sage and thyme.
    • Why it’s healthy: It is packed with complex carbohydrates, healthy fats, and fiber to keep blood sugar stable throughout the long feast.

    Prep time: 20 mins | Cook time: 45 mins | Servings: 4

    1. Prep the Squash: Preheat your oven to 400°F (200°C). Halve 4 honeynut (or small acorn) squashes lengthwise and scoop out the seeds. Brush the flesh lightly with olive oil, drizzle with a tiny bit of pure maple syrup, and season with salt and pepper. Place them cut-side down on a parchment-lined baking sheet. Bake for 30–35 minutes until tender when pierced with a fork.
    2. Cook the Grain: While the squash roasts, rinse 1 cup of wild rice. Bring it to a boil in 3 cups of low-sodium vegetable broth, then cover, lower the heat, and simmer for 40–45 minutes until the grains burst and are tender. Drain any excess liquid.
    3. Make the Filling: Heat 1 tbsp olive oil in a skillet over medium heat. Sauté 1 diced shallot and 2 finely chopped celery stalks for 5 minutes until soft. Stir in 1 tbsp minced fresh sage and 1 tbsp fresh thyme leaves, cooking for 1 more minute.
    4. Combine: Toss the cooked wild rice, sautéed vegetables, ½ cup dried cranberries, and ½ cup toasted, chopped pecans together in a large bowl.
    5. Stuff and Serve: Flip the roasted squashes cut-side up. Mound a generous amount of the wild rice mixture into each squash cavity. Pop them back into the oven for 5–10 minutes to warm everything through before serving.

    2. Garlic & Herb Smashed Cauliflower and Red Potatoes
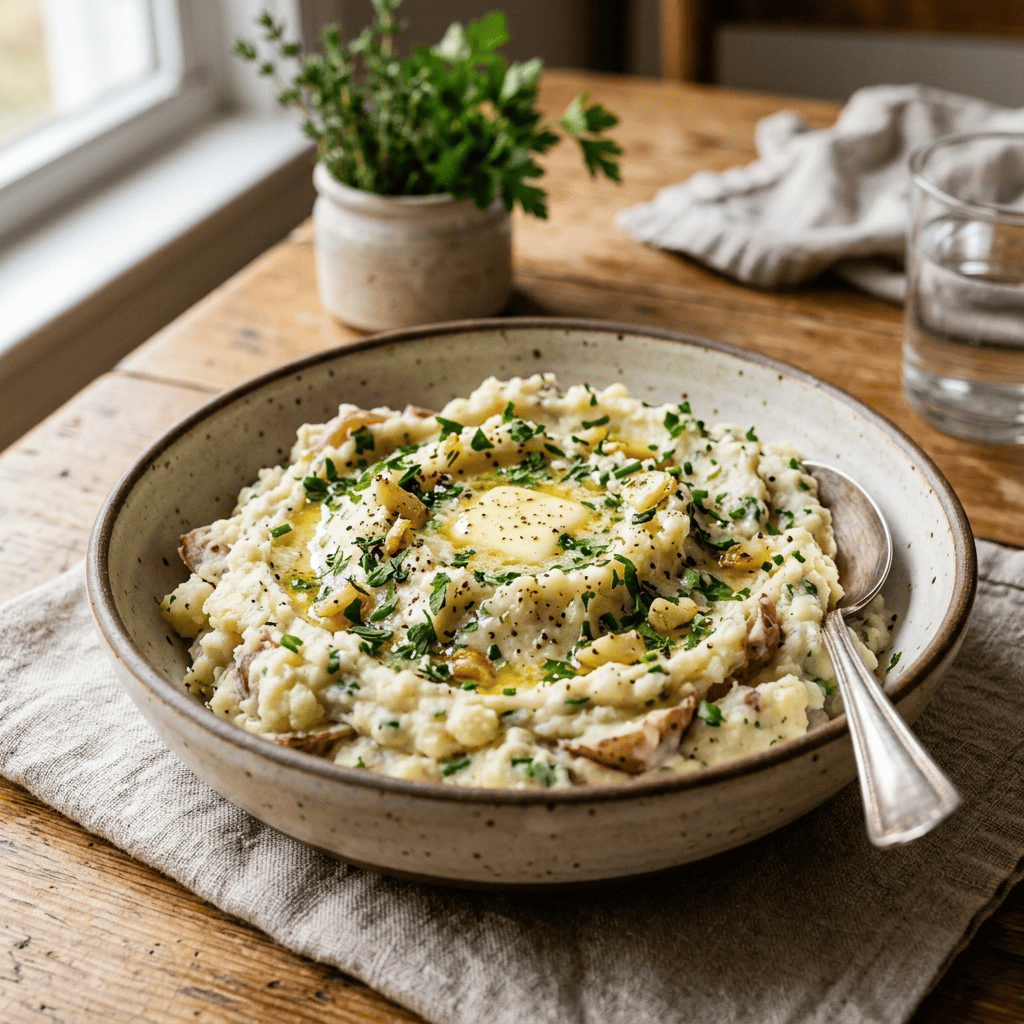
    Bowl of mashed potatoes topped with butter, herbs, garlic, and pepper

    You don’t have to completely give up potatoes to keep things light. Blending them with cauliflower creates a fluffy, buttery texture with a fraction of the heavy carbs and calories.

    • The Blend: A 50/50 mix of steamed cauliflower florets and skin-on red potatoes (the skins add rustic texture and extra fiber).
    • The Creaminess: Skip the heavy cream and cream cheese. Mash using extra virgin olive oil, a splash of unsweetened almond milk, and plenty of roasted garlic.
    • The Finish: Fold in a generous handful of fresh, chopped chives and rosemary.
    • Why it’s healthy: Cauliflower brings vitamin C and cellular-protecting antioxidants, while olive oil provides heart-healthy monounsaturated fats.

    Prep time: 15 mins | Cook time: 20 mins | Servings: 6

    1. Chop the Veggies: Wash and chop 1 lb of red potatoes into 1-inch chunks (leave the skins on). Cut 1 large head of cauliflower into florets.
    2. Boil or Steam: Place the potato chunks in a large pot, cover with water, add a pinch of salt, and bring to a boil. Cook for 10 minutes, then add the cauliflower florets to the same pot. Boil together for another 10 minutes until both are completely fork-tender. Drain thoroughly and let sit in the colander for 2 minutes to let excess steam escape (this prevents watery mash).
    3. Sauté the Garlic: While boiling, warm 3 tbsp extra virgin olive oil in a small pan over low heat. Add 4 minced garlic cloves and cook for 2 minutes until fragrant but not browned.
    4. Mash: Return the potatoes and cauliflower to the warm pot. Pour in the garlic oil and ¼ cup unsweetened almond milk (warm). Use a potato masher to smash the mixture until it reaches a rustic, fluffy texture.
    5. Season: Stir in ¼ cup finely chopped fresh chives, 1 tbsp minced fresh rosemary, salt, and black pepper to taste.

    3. Shaved Brussels Sprout & Pomegranate Salad with Dijon Cider Vinaigrette
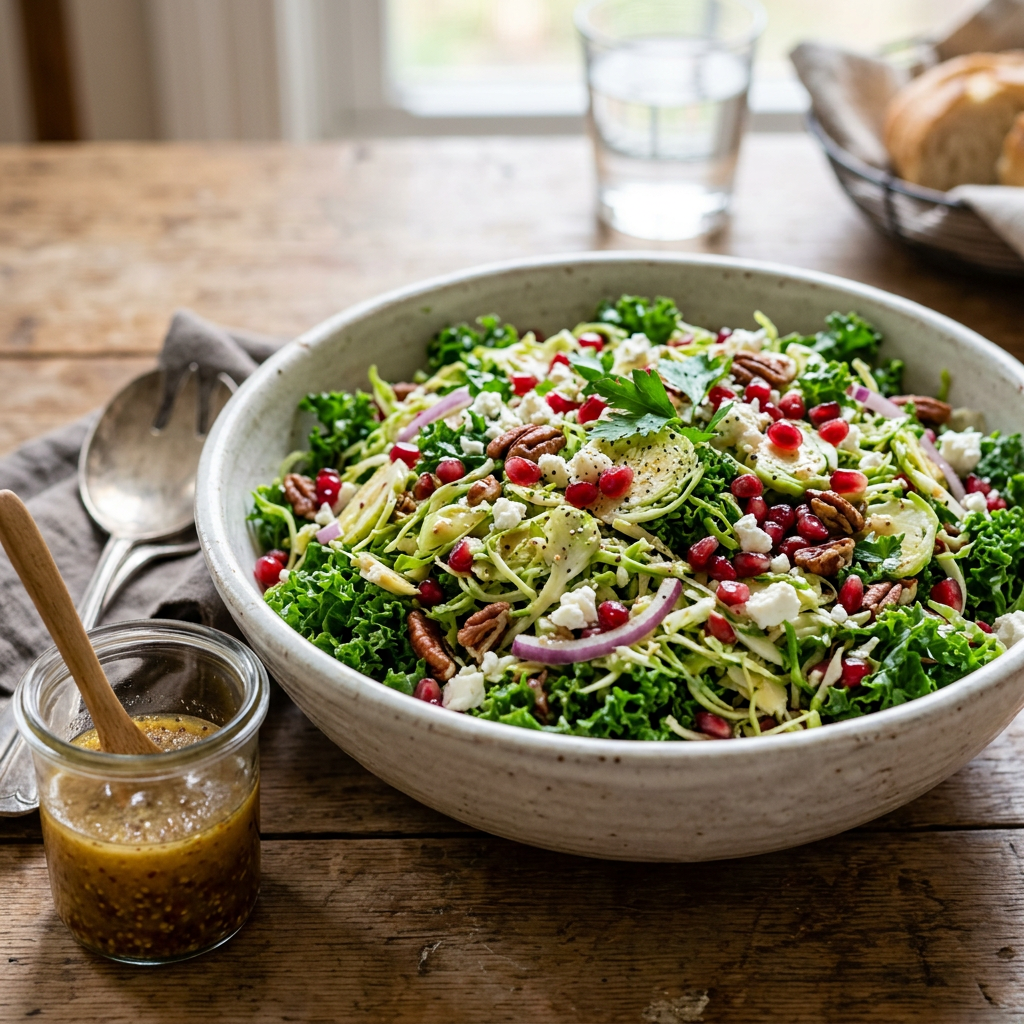
    Colorful kale salad with pomegranate seeds, pecans, feta, and dressing

    Skip the heavy, flour-laden green bean casserole for a bright, raw, and refreshing salad that cuts through the richness of the rest of the meal.

    • The Base: Finely shaved or chopped raw Brussels sprouts and crisp lacinato kale.
    • The Toppings: Vibrant pomegranate seeds (which look like little jewels on the plate) and toasted pumpkin seeds (pepitas).
    • The Dressing: A simple whisk of apple cider vinegar, Dijon mustard, a touch of raw honey, and olive oil.
    • Why it’s healthy: Raw cruciferous vegetables provide powerful digestive enzymes that help your body process a large holiday meal with ease.

    Prep time: 20 mins | No cook time | Servings: 6

    1. Shred the Greens: Wash and trim the ends off 1 lb of Brussels sprouts. Use a food processor with a slicing disc (or a sharp knife) to shred them finely. Destem 1 bunch of lacinato kale and ribbon-cut it into thin strips. Toss the greens together in a large serving bowl.
    2. Massage the Greens: Drizzle 1 tsp of olive oil and a pinch of salt over the kale and sprouts. Use clean hands to gently massage the greens for 1–2 minutes. This breaks down the tough fibers, making them tender and easier to digest.
    3. Whisk the Dressing: In a small bowl, whisk together ¼ cup extra virgin olive oil, 2 tbsp apple cider vinegar, 1 tbsp Dijon mustard, 1 tbsp raw honey (or maple syrup), and a pinch of salt and pepper.
    4. Assemble: Pour the dressing over the massaged greens and toss well to coat.
    5. Garnish: Right before serving, fold in ½ cup fresh pomegranate seeds and ⅓ cup toasted pumpkin seeds (pepitas) for beautiful color and crunch.

    4. Orange Ginger Cranberry Relish

    Bowl of cranberry relish with orange zest, ginger, cranberries, and orange

    Canned cranberry sauce is usually loaded with high-fructose corn syrup. This fresh, zesty alternative takes 10 minutes to make and pops with clean flavor.

    • The Ingredients: Fresh, whole organic cranberries, simmered with the juice and zest of an orange, a hint of grated fresh ginger, and sweetened gently with pure maple syrup.
    • The Twist: A pinch of cinnamon adds natural warmth.
    • Why it’s healthy: Cranberries are absolute powerhouses of antioxidants, and fresh ginger acts as a natural digestive aid.

    Prep time: 5 mins | Cook time: 10 mins | Yield: 2 cups

    1. Combine: In a medium saucepan, combine 12 oz of fresh organic cranberries (washed), the juice and zest of 1 organic orange, 1 tsp freshly grated ginger, and ⅓ cup pure maple syrup.
    2. Simmer: Bring the mixture to a gentle boil over medium-high heat. Once boiling, reduce the heat to low and let it simmer for 8–10 minutes.
    3. Pop: Stir occasionally. You will hear the cranberries begin to burst open. Use the back of your spoon to gently mash some of them against the side of the pot to create your desired texture.
    4. Cool: Remove from heat and stir in ¼ tsp of ground cinnamon. The relish will look a bit loose but will thicken significantly as it cools. Serve chilled or at room temperature. (Note: This can be made up to 3 days in advance!)

    5. No-Bake Pecan Crust Pumpkin Pie Bars

    Pumpkin dessert bar topped with whipped cream, cinnamon, and pecans

    A Thanksgiving feast isn’t complete without pumpkin pie. This version is dairy-free, gluten-free, and incredibly rich without the post-dessert sugar crash.

    • The Crust: A raw, press-in crust made from raw pecans, medjool dates, and a pinch of sea salt blended in a food processor.
    • The Filling: Pure pumpkin puree whisked with coconut cream, pumpkin pie spice, and a touch of maple syrup, set naturally in the fridge using a bit of agar-agar or arrowroot powder.
    • Why it’s healthy: Eliminating refined flour and white sugar means your guests get a dose of vitamin A and healthy fats, keeping holiday energy high for post-dinner family fun.

    Prep time: 20 mins | Chill time: 4 hours | Servings: 9–12 bars

    1. Make the Crust: Line an 8×8-inch baking pan with parchment paper, leaving an overhang on the sides. In a food processor, blend 2 cups of raw pecans, 1 cup of pitted Medjool dates (if they feel dry, soak them in hot water for 10 minutes then drain), and a pinch of sea salt. Blend until it forms a sticky, crumbly dough that holds together when pinched. Press firmly and evenly into the bottom of your lined pan.
    2. Blend the Filling: Wipe out the food processor. Add 1 can (15 oz) of pure pumpkin puree (not pumpkin pie mix), ½ cup of thick coconut cream (the solid white part from the top of a chilled can of full-fat coconut milk), ⅓ cup pure maple syrup, 2 tsp pumpkin pie spice, and 1 tsp pure vanilla extract.
    3. Thicken the Filling: To ensure the bars set without baking, blend 2 tbsp of arrowroot powder (or tapioca starch) into the pumpkin mixture until completely smooth and emulsified.
    4. Pour and Chill: Pour the pumpkin filling over the pecan crust and smooth the top with a spatula. Place the pan flat in the refrigerator to chill for at least 4 hours (or overnight) until firm.
    5. Slice: Use the parchment paper overhang to lift the bars out of the pan. Slice into squares using a warm, sharp knife, cleaning the blade between cuts. Garnish with a sprinkle of cinnamon or extra chopped pecans if desired.


    The Heart of the Gathering

    When the candles are lit, the food is served, and your family takes their seats, remember that the most important element of the table is the love filling the chairs around it. By choosing conscious, healthy materials and focusing on connection, you are creating a space where physical wellness and emotional warmth live side-by-side.

    From our healthy home to yours, we wish you a beautiful, joyful, and deeply connected Thanksgiving.

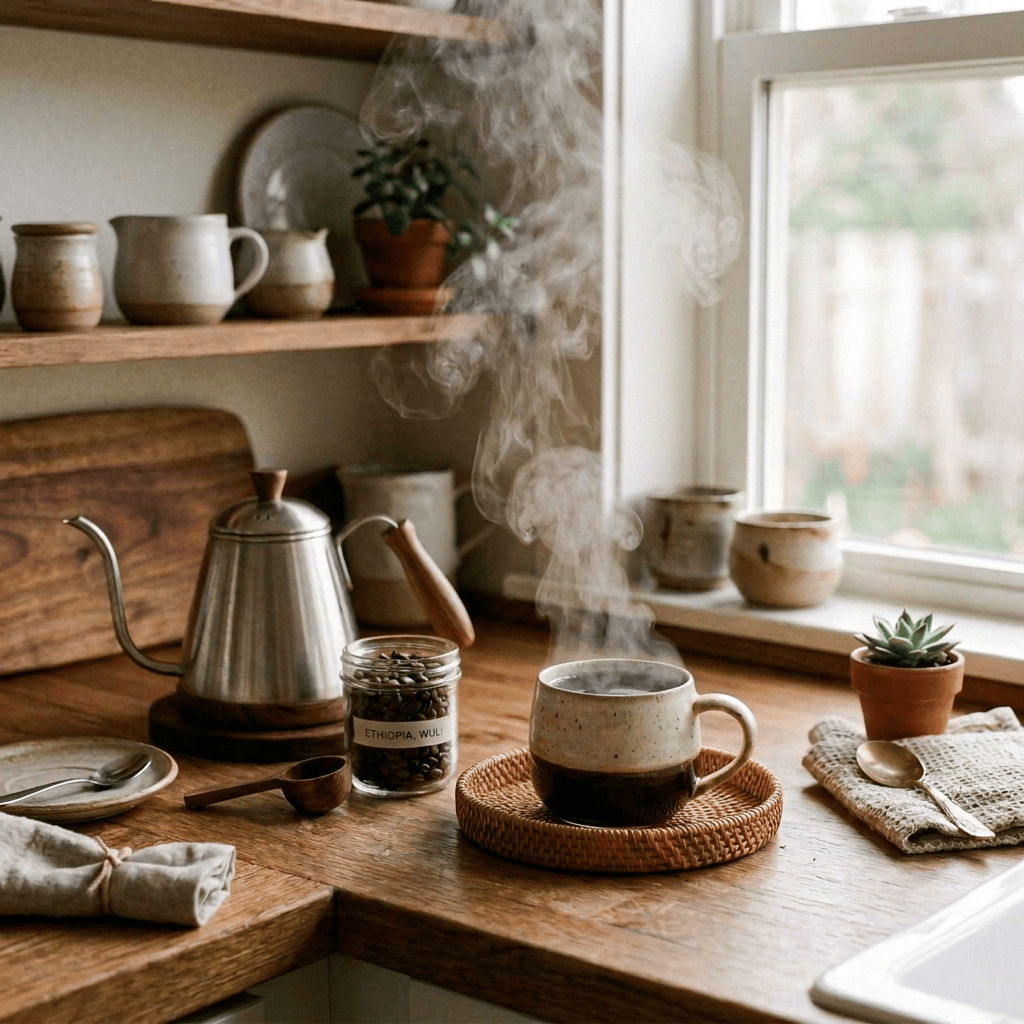
    Autumn wreath of flowers, berries, and leaves on a rustic table
  • The Low-Tox Coffee Station: Simple Swaps for a Better Cup of Coffee (and a healthier life)

    Pour-over coffee brewing into a ceramic mug on a wooden kitchen counter

    What’s Inside:

    1. First, Let’s Talk Coffee
      Why your morning cup is a surprisingly good place to start making low-tox swaps.
    2. Build a Coffee Station You’ll Actually Love
      The simple essentials that turn your coffee corner into a cozy little morning ritual.
    3. The Low-Tox Coffee Gear Guide
      Brewers, grinders, kettles, mugs, and the materials worth paying attention to.
    4. The Water in Your Coffee Matters More Than You Think
      Because your coffee is mostly water—and your cup deserves better than an afterthought.
    5. What’s Actually in Your Coffee?
      A look at beans, filters, storage, and those little add-ins that can make a big difference.
    6. Coffee Drinks 101: Finally, the Menu Makes Sense
      Americano? Cortado? Flat white? Macchiato? Let’s decode the café menu without requiring a barista certification.
    7. So…What’s the Difference Between a Latte and a Cappuccino?
      Plus the surprisingly simple formula behind all your favorite espresso drinks.
    8. Not an Espresso Person? You’re Still Invited.
      Pour-over, French press, Moka pot, drip coffee—and which one might be your perfect match.
    9. Cold Coffee Has Entered the Chat
      Iced coffee, cold brew, and nitro: what’s actually different?
    10. The “Please Don’t Let My Coffee Maker Become a Science Experiment” Section
      Cleaning, drying, and keeping those hidden nooks from becoming questionable.
    11. My Simple Low-Tox Coffee Station Formula
      The easy checklist for upgrading your routine without changing your entire kitchen.
    12. Start With One Swap
      Because low-tox living should make your life feel better—not give you another 47 things to worry about. Let’s go!

    Coffee Talk:

    If coffee is part of your morning ritual, you might as well make it a good one.

    And by good, I mean more than delicious.

    Your coffee station is one of those little areas of your home that you interact with every single day. So when I started making changes toward a lower-tox lifestyle, my coffee routine was one of the first places I looked.

    I started asking questions I had never really thought about before:

    What is my coffee made with?
    What is my machine made of?
    What does the hot water actually touch?
    What am I adding to my cup?
    And perhaps most importantly—how hard would it be to make some better choices?

    The good news?

    It doesn’t have to be complicated.

    You don’t need to turn your kitchen into a coffee laboratory or become a professional barista overnight. A few intentional swaps can make your morning coffee routine feel cleaner, simpler, and a whole lot more enjoyable.

    Let’s make your coffee corner a little healthier—and maybe a little prettier while we’re at it.

    **People also like reading, “The Top 5 Healthiest Hot Drinks ( With Recipes & Wellness Tips)”


    What Exactly Is a Low-Tox Coffee Station?

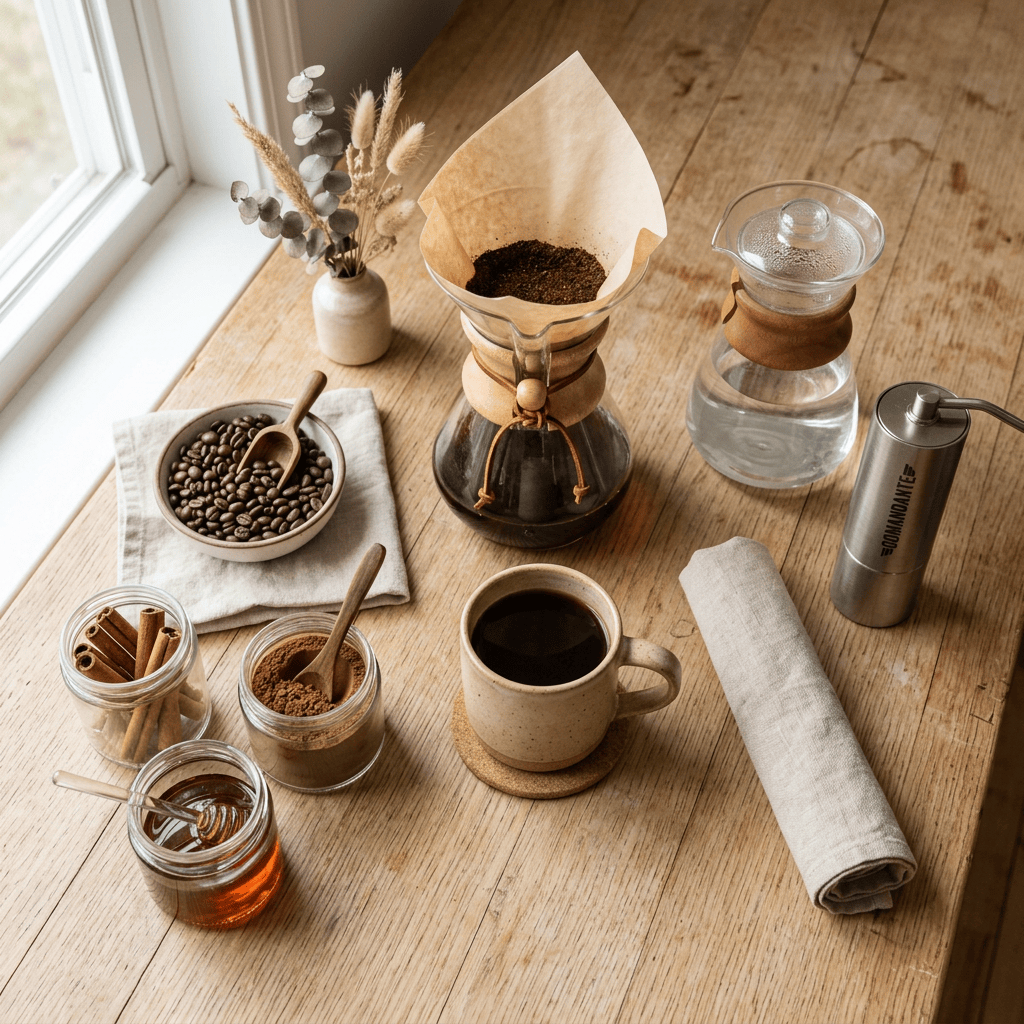
    Pour-over coffee setup with beans, spices, honey, and mug

    For me, a low-tox coffee station is less about chasing perfection and more about being thoughtful about the things that come into contact with my food and drinks every day.

    The biggest areas to consider are:

    • The water you use
    • The materials your coffee and hot water come into contact with
    • The coffee beans and ingredients you choose
    • How easy your equipment is to clean and dry
    • What you use to store, stir, and drink your coffee

    One simple principle from my own low-tox journey really stuck with me:

    Pay special attention when heat, acidity, and plastic come together.

    Coffee is hot and mildly acidic, so choosing brewing equipment with glass, stainless steel, ceramic, or other materials designed for hot beverages can be a simple place to start.

    And you don’t have to replace everything at once.

    Start with the thing you use most.


    *This post contains affiliate links. As an Amazon Associate, I earn from qualifying purchases. This means that if you click on a link and make a purchase, I may receive a small commission at no additional cost to you. I only recommend products I genuinely love, use, or believe will add value to your home and wellness journey. Thank you for supporting my work! Full Healthy Coffee Station Storefront Here


    Step One: Create a Coffee Station You Actually Enjoy

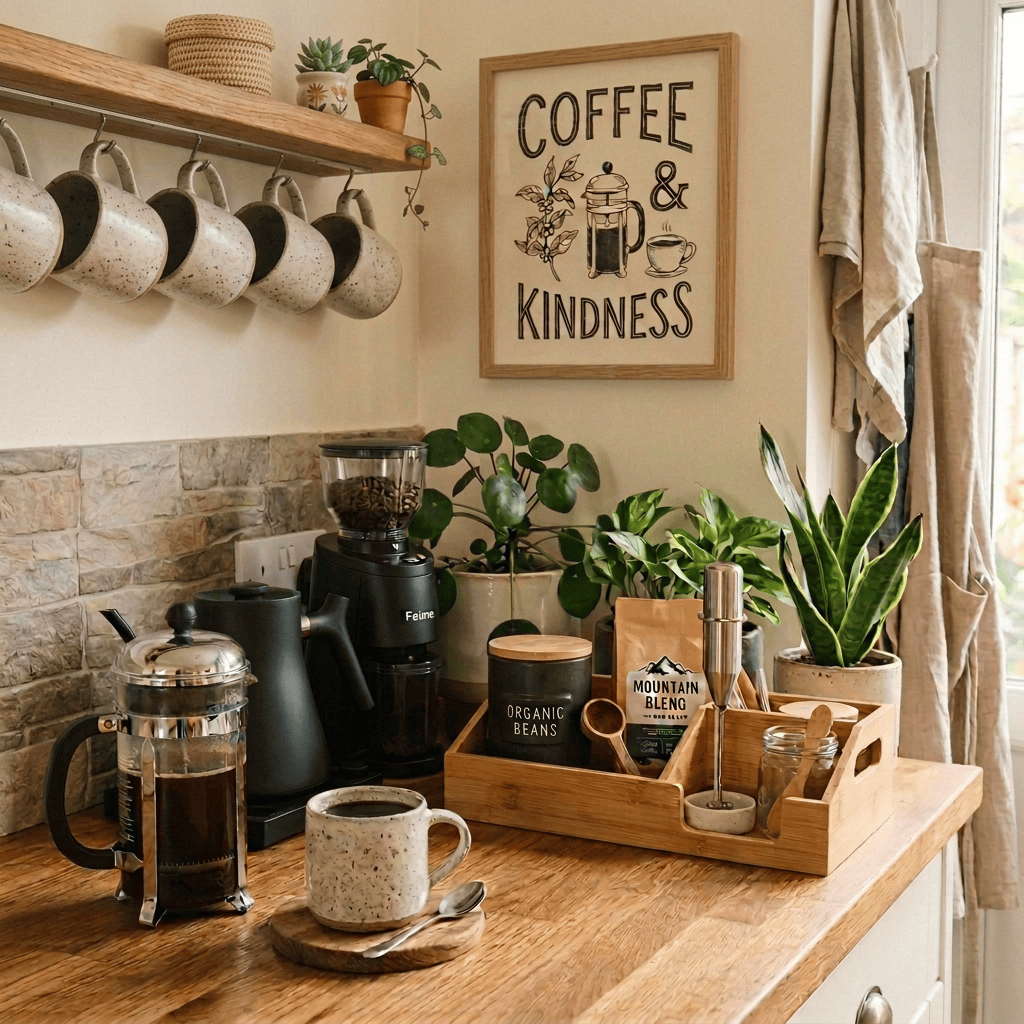
    Cozy coffee station with mugs, coffee makers, plants, and kindness sign

    Before we get into the coffee itself, let’s talk about the station.

    Because let’s be honest—if your coffee maker is wedged between the toaster and a pile of mail, it’s probably not exactly giving peaceful morning ritual.

    Your coffee station doesn’t have to be fancy. It can be:

    Ideally, you’ll want it close to an outlet and somewhere near your water source or filtered-water pitcher.

    Then keep the essentials within easy reach:

    Brewer + grinder + kettle + mugs + coffee + your favorite add-ins.

    That’s really the heart of it.

    Add a little silicone tray underneath your machine for drips and stray grounds, a pretty dish towel, and maybe a plant or small piece of artwork.

    Suddenly, making coffee feels less like a chore and more like a tiny morning ritual.


    The Low-Tox Coffee Station Essentials

    You don’t need every gadget on the coffee aisle.

    Start with the basics.

    **My Full Comparison Guide Here– Why in the heck are these products so great?

    -Your Brewer

    This is where you have the most choices.

    You can go completely manual with a pour-over, French press, or Moka pot. Or, if convenience is non-negotiable, look for an automatic machine designed with thoughtful materials and a brewing path that minimizes plastic contact with hot water.

    Some of the options worth exploring include:

    The goal isn’t necessarily to find the perfect machine.

    It’s to find the machine that fits your actual life.

    Because the healthiest coffee maker in the world isn’t very helpful if it takes 25 minutes to make your coffee and you hate using it.

    -Your Grinder

    Freshly ground coffee can make a surprisingly big difference in flavor.

    A burr grinder gives you a more consistent grind than many basic blade grinders, and it doesn’t have to be complicated. (this pick is considered a low-plastic exposure grind) Or you can try a manual grinder for a more intentional, COMPLETELY plastic-free grind (gold standard).

    If you’re upgrading one piece of your coffee setup, this is a fun one to consider.

    -Your Kettle

    If you’re using a pour-over or French press, a good kettle makes the process much easier.

    Look for a glass or stainless-steel option, especially one designed so the hot water itself isn’t sitting against unnecessary plastic components.

    A gooseneck kettle is particularly handy for pour-over coffee because it gives you much more control over the flow of water.

    -Your Mug

    This may be the easiest swap of all.

    Choose lead-free ceramic, porcelain, or borosilicate glass for your everyday coffee.

    And let’s be honest—this is also the fun part.

    Find a mug that makes you happy.

    Your coffee doesn’t need to be served in a beige office mug that says “World’s Okayest Employee.“


    Don’t Forget the Water

    MAXTRA water filter pitcher filled with water beside kitchen sink

    Here’s a simple thing many of us overlook:

    Coffee is mostly water.

    So the water you start with matters—not just for the quality of your coffee, but also because it’s the largest ingredient in the cup.

    If you’re working toward a lower-tox routine, consider using filtered water rather than relying solely on unfiltered tap water.

    Depending on your home’s water quality and your preferences, options include:

    If you use reverse osmosis, you may also want to look into remineralization drops for taste and mineral content.

    And there’s a bonus:

    Better water can make better coffee.

    So this isn’t just about what you’re keeping out of your cup. It’s also about getting more flavor into it.


    Choose Better Beans

    Seven labeled coffee bean varieties arranged by origin and roast level

    Now for arguably the most important ingredient:

    The coffee.

    If you’re going to put thought into your coffee equipment, don’t forget what’s actually going into the filter.

    **Consider choosing organic coffee and, if this is important to you, look for brands that provide transparent information about testing for mold, yeast, and mycotoxins. (the way beans are picked, handled, and stored matters!)

    Freshness matters, too.

    Buy whole beans when possible and store them in an airtight, opaque container made from glass or stainless steel.

    You don’t need a giant collection of coffee beans taking over your pantry.

    One or two great bags that you actually love will do just fine. These are my top 3 favorites for purity, flavor, and affordability:

    Four Sigmatic Gut Health Organic Ground Coffee – A clean, single-origin coffee that keeps my gut happy

    Bulletproof Original Medium Roast  – A clean coffee with sustainable harvest practices tthat protect fair wages, workers’ rights and the environment

    Purity Coffee Mediulm Roast – Has a great taste and is easy on my stomach


    And Then There Are the Add-Ins…

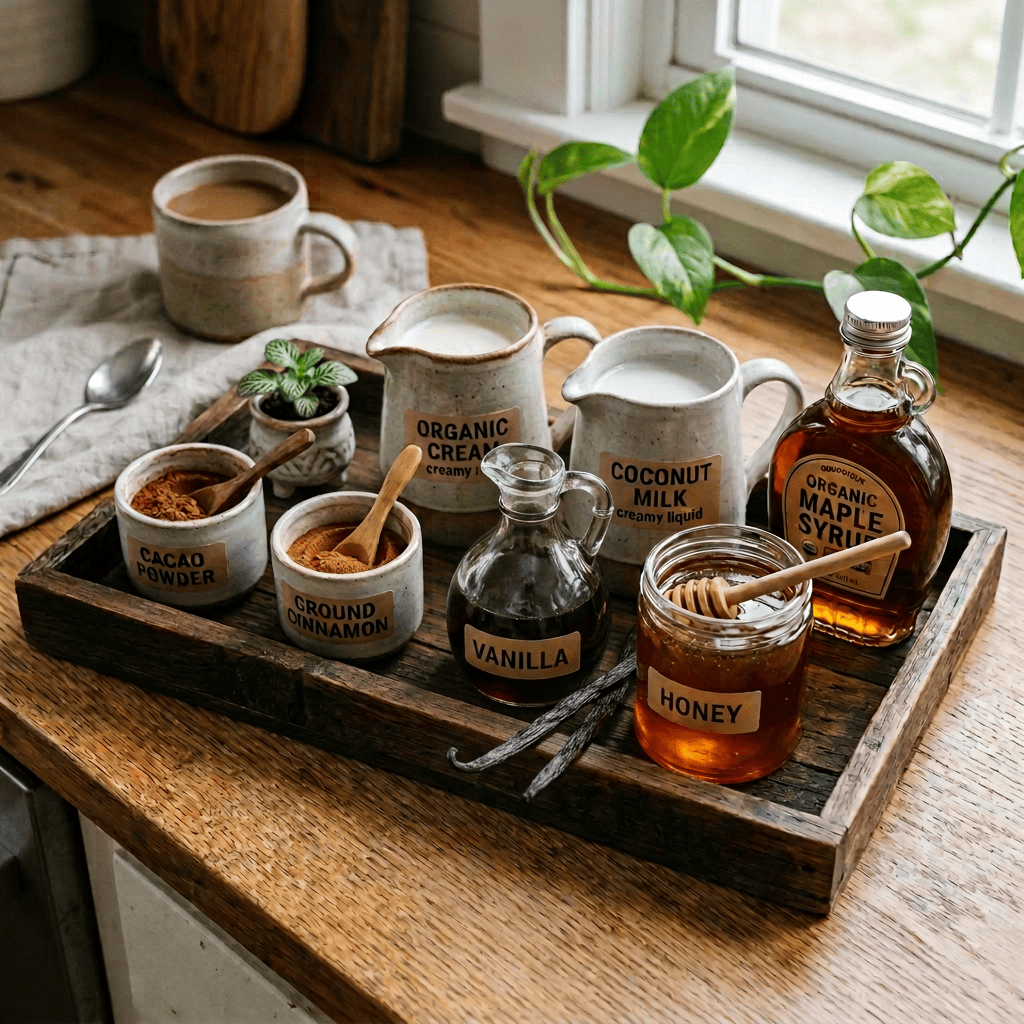
    Rustic coffee tray with labeled milks, spices, honey, and maple syrup

    This is where coffee gets fun.

    Because not everyone wants a straight black cup of coffee at 7:00 a.m.

    And that’s okay.

    You can create a delicious coffee without loading it up with highly processed creamers and artificial flavors. (really read the ingredients and you will probably never touch the stuff again)

    Some simple add-ins to experiment with include:

    Think of your coffee as a blank canvas.

    A little cinnamon can make a basic latte feel cozy.

    Cacao can turn your morning coffee into a healthy, mocha-inspired treat.

    Vanilla and a splash of cream can make a simple cup feel downright luxurious.

    And sometimes, a drizzle of maple syrup is all you need.

    **One more luxury item: A hand-held coffee frother can turn any coffee drink into an experience. Plus, it is down-right handy to mix up all your add-ins with. I love, love, love mine and use it all the time!


    Coffee Drinks 101: What Are You Actually Ordering?

    Okay, now for the fun part.
    If you’ve ever stared at a coffee menu and thought, “I know what a latte is… I think?” you’re going to love this next section.

    Eight labeled coffee drinks: espresso, macchiato, cortado, cappuccino, Americano, flat white, latte, and mocha

    If the coffee menu at your favorite café sometimes feels like it requires a translator, you’re not alone.

    Let’s simplify it.

    Most espresso drinks are simply combinations of espresso + water + milk + foam, with the proportions changing from drink to drink.

    Here’s your cheat sheet:

    *Espresso

    The concentrated little powerhouse of the coffee world.

    An espresso is typically served as a single or double shot and has a rich, intense flavor with a layer of crema on top.

    Want it strong and simple? This is your drink.

    *Americano

    Espresso + hot water.

    It’s a great option if you love the flavor of espresso but want a larger, lighter drink.

    Think: espresso meets traditional coffee.

    *Macchiato

    Espresso with just a small amount of steamed milk or foam.

    It’s bold, simple, and definitely coffee-forward.

    Think: espresso with a tiny splash of softness.

    *Cortado

    Equal parts espresso and warm steamed milk.

    The milk takes the edge off the espresso without turning it into a giant milky drink.

    Think: balanced, smooth, and not too sweet.

    *Cappuccino

    Espresso + steamed milk + a generous amount of airy foam.

    This is the fluffy one.

    Think: light, creamy, and foamy.

    *Latte

    Espresso + lots of steamed milk + a thin layer of foam.

    If you like your coffee creamy and smooth, the latte is probably your friend.

    And this is where you can have some fun with cinnamon, vanilla, cacao, or a little maple syrup.

    *Flat White

    Espresso with silky microfoam and less foam than a traditional cappuccino.

    It’s creamy but still has a stronger coffee flavor than a typical latte.

    Think: latte’s slightly more coffee-forward cousin.

    *Mocha

    Espresso + chocolate + steamed milk.

    Basically, coffee and chocolate decided they were better together.

    Use cacao or your preferred chocolate ingredient to create a more intentional, healthy version at home.


    Not in the Mood for Espresso?

    French press, moka pot, and pour-over coffee setup on wooden counter

    No problem.

    There are plenty of delicious ways to make coffee without an espresso machine.

    *Drip Coffee

    The classic.

    Hot water passes through coffee grounds and a filter, producing the familiar everyday cup of coffee.

    Simple. Reliable. No coffee degree required.

    *Pour-Over

    This is where coffee gets a little more hands-on.

    You slowly pour hot water over your grounds, allowing the water to extract the coffee as it passes through the filter.

    A Chemex or Hario V60 can make a beautifully clear, bright cup.

    And yes, it can feel fancy.

    But once you get the hang of it, it’s actually very simple.

    *French Press

    Add coarse coffee grounds, add hot water, let it steep, and press.

    That’s basically it.

    French press coffee tends to be richer and more full-bodied because the grounds steep directly in the water.

    It’s also one of the easiest low-tech brewing methods to master.

    *Moka Pot

    A Moka pot uses pressure from heated water to brew a concentrated, rich coffee.

    It’s not technically espresso, but it gives you that bold, syrupy coffee experience without needing an espresso machine.

    Plus, it looks adorable sitting on the stove.


    And Then There’s Cold Coffee

    Iced latte, cold brew, and dark coffee served on a café table

    Because sometimes it’s August and the last thing you want is a steaming mug of coffee.

    *Iced Coffee

    This is simply hot-brewed coffee served chilled over ice.

    Easy, refreshing, and perfect for leftover morning coffee.

    *Cold Brew

    Cold brew is made by steeping coffee grounds in cool or room-temperature water for an extended period, often 12–24 hours.

    The result is smooth, mellow, and naturally sweet-tasting.

    Make a batch ahead of time and keep it in the refrigerator for an easy grab-and-go coffee.

    *Nitro Cold Brew

    Take cold brew and infuse it with nitrogen.

    The result is a creamy, velvety texture with a foamy top.

    It looks fancy.

    It tastes fancy.

    But the basic idea is surprisingly simple.


    The Secret Ingredient Nobody Talks About: Cleanliness

    Coffee cleaning supplies labeled Natural Descaling Tablets, Natural Coffee Machine Cleaner, Citric Acid, and Baking Soda

    Here’s the glamorous part of owning a coffee station:

    Cleaning it.

    I know. Exciting.

    But this is one area where simple equipment has a major advantage.

    Manual brewing methods such as French presses and pour-over brewers can be taken apart, washed, and thoroughly dried.

    Automatic coffee machines can have internal reservoirs and tubing that are harder to access, so following the manufacturer’s cleaning and descaling recommendations is important.

    For machines with internal water tanks, make regular cleaning part of your routine rather than waiting until your coffee starts tasting suspiciously like yesterday’s coffee. (think mold source-yuck!)

    A clean coffee maker simply makes better coffee.

    And your future self will thank you.


    You Don’t Have to Do It All

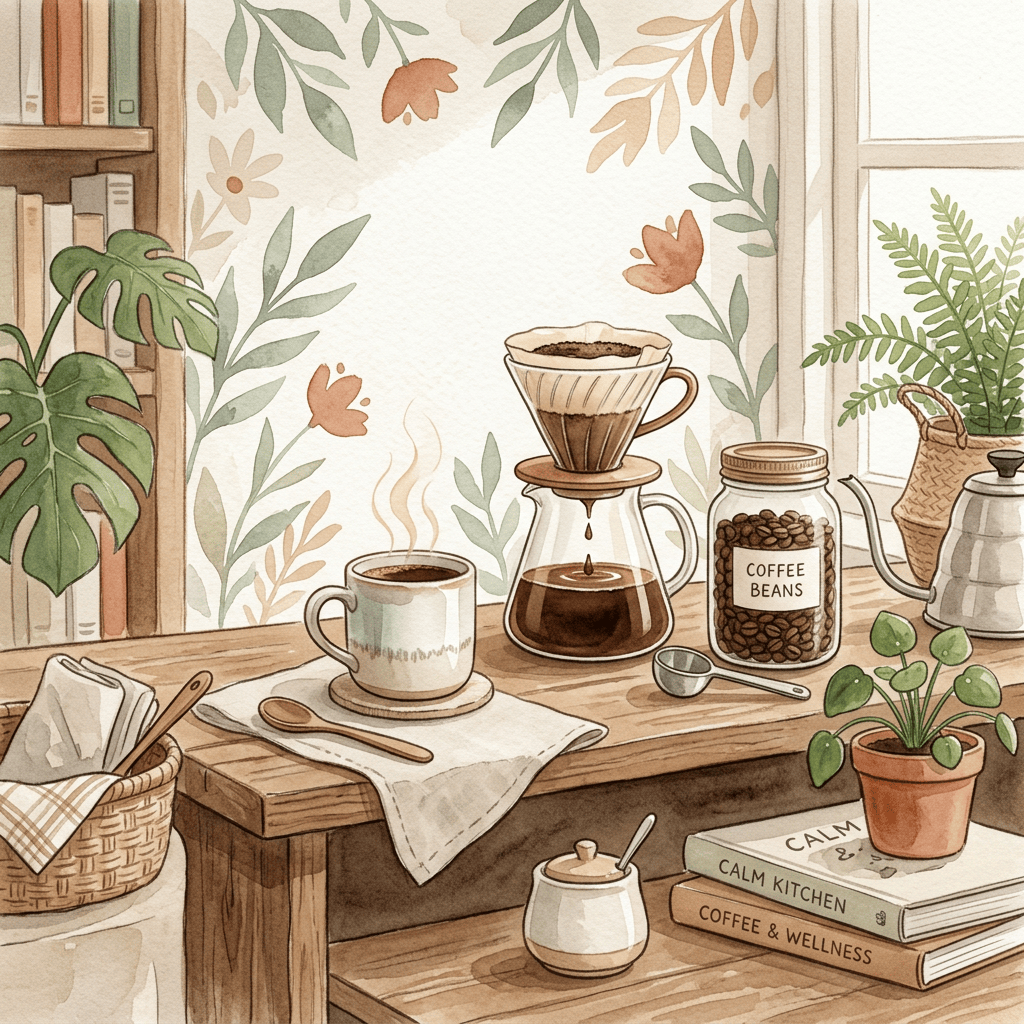
    Illustrated coffee station with brewing equipment, plants, books, and steaming cup

    This is probably the most important takeaway.

    You don’t need to wake up tomorrow and throw away every appliance in your kitchen.

    Start small.

    Maybe your first swap is your coffee mug.

    Then your water.

    Then your beans.

    Then, when it’s time to replace your coffee maker anyway, choose a machine that better fits your low-tox priorities.

    Little changes add up.

    And honestly, I think that’s what makes this approach sustainable.

    The goal isn’t perfection. It’s creating a morning routine that feels good, tastes good, and works for your life.


    My Simple Low-Tox Coffee Station Formula

    If you want to keep it really simple, start here:

    1. Choose a brewing method you will actually use.

    2. Minimize unnecessary plastic contact with hot water and coffee.

    3. Use filtered water.

    4. Choose quality coffee beans that fit your preferences and priorities.

    5. Store your beans properly.

    6. Use simple, intentional ingredients for your creamers and sweeteners.

    7. Choose glass, ceramic, or stainless steel for the things touching your coffee.

    8. Keep your equipment clean and dry.

    9. Make your coffee station beautiful enough that you actually want to use it.

    That’s it.

    No complicated morning routine.

    No need to become a coffee snob.

    Just a few thoughtful swaps that can turn an ordinary corner of your kitchen into a coffee station you genuinely look forward to using.


    Build Your Coffee Corner Your Way

    Whether you’re a straight-black-coffee person, a daily latte lover, a French press fan, or someone who considers iced coffee a year-round food group, there’s a low-tox approach that can work for you.

    And that’s the fun part.

    You get to build a coffee routine around your preferences.

    Start with one swap.

    Choose one product you love.

    Make one small improvement.

    Then enjoy your coffee.

    Because a healthier home doesn’t have to feel restrictive.

    Sometimes it can look like a beautiful little coffee station, a favorite mug, fresh beans, and five quiet minutes before the day gets started.

    And honestly?

    I’ll drink to that.

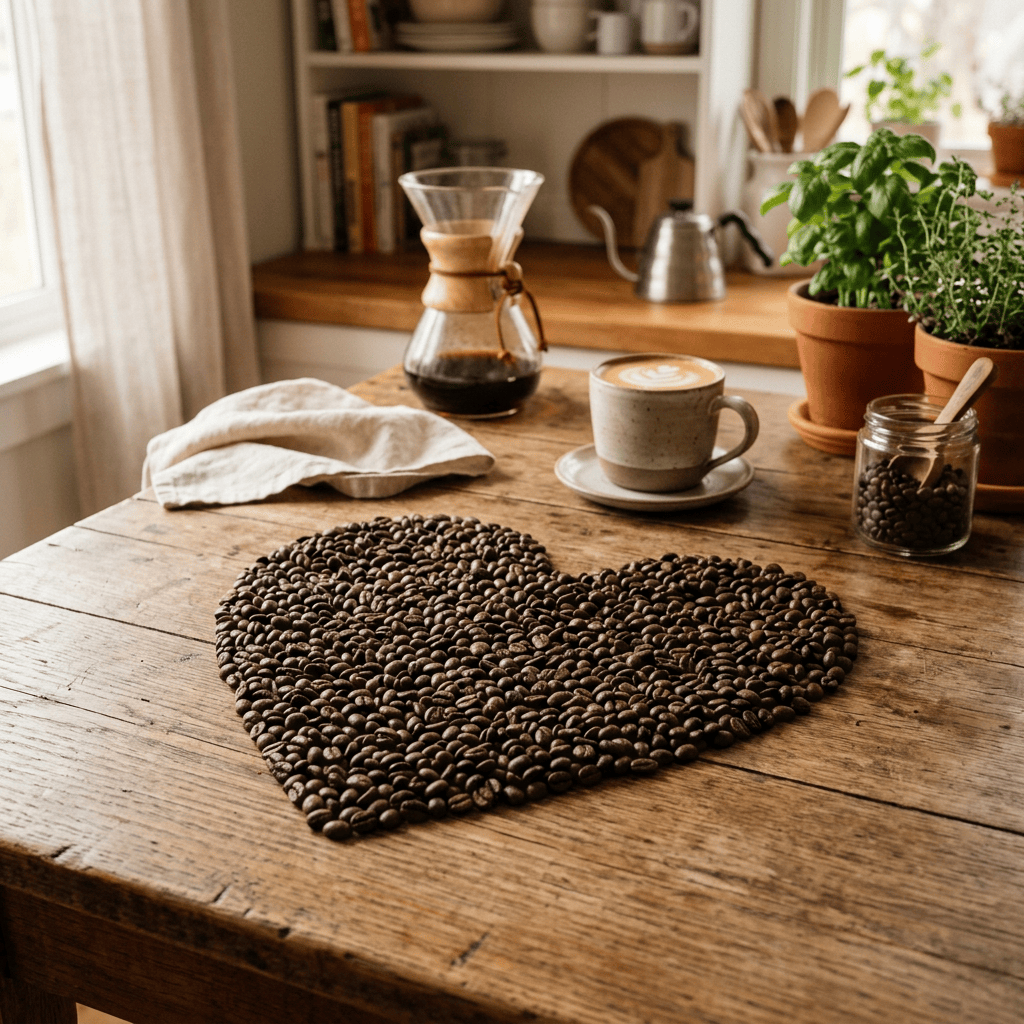
    Heart made of coffee beans beside brewed coffee and a pour-over carafe
  • 30 Pantry Organization Ideas That Actually Work (For Every Pantry Size)

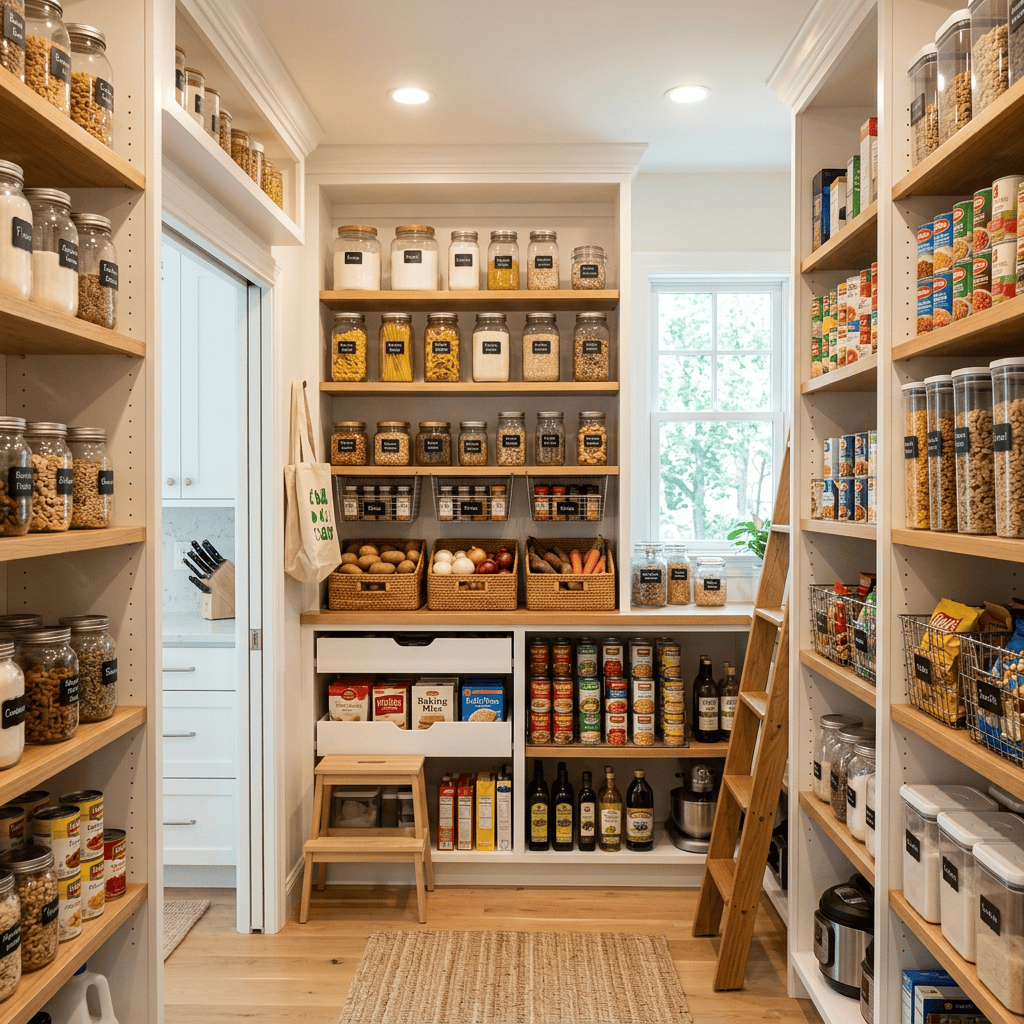
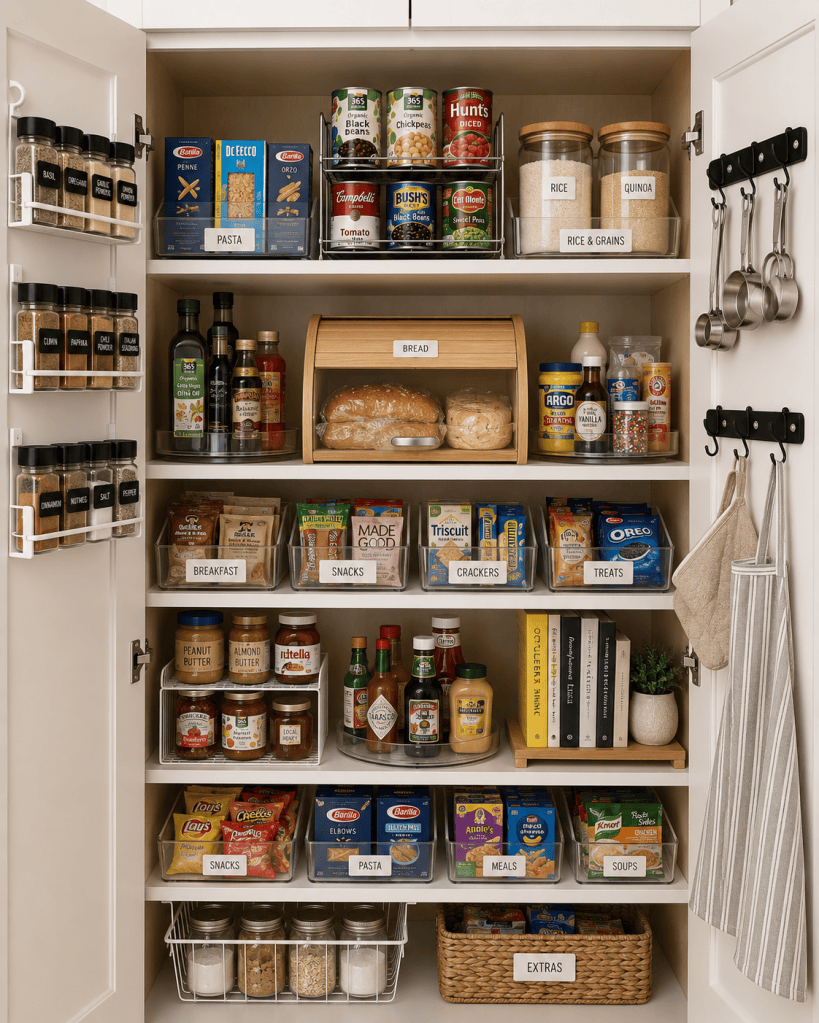
    Kitchen pantry with shelves of labeled jars, baskets of vegetables, canned goods, and bottles.

    Let’s be honest—not everyone has a Pinterest-worthy walk-in pantry, and that’s perfectly okay.

    Whether your “pantry” is an entire room, a tiny closet, or one hardworking kitchen cabinet, the right organization can make your space feel bigger, look cleaner, and help you waste less food. The best part? You don’t need a full kitchen remodel to make a huge difference.

    I’ve rounded up 30 pantry organization ideas for three of the most common pantry styles: walk-in pantries, closet pantries, and small cupboard pantries. Mix and match these ideas to create a pantry that works for your family, your routine, and your budget.


    Quick Pantry Organization Checklist:

    ✔ Declutter and toss expired food

    ✔ Measure your shelves

    ✔ Group similar items together

    ✔ Create pantry zones

    ✔ Label everything

    ✔ Store everyday items at eye level

    ✔ Use vertical space

    ✔ Rotate older food to the front


    Before You Organize Your Pantry…

    Shelves of pantry stocked with cereals, jars, canned goods, and cleaning supplies

    Before you start buying baskets and bins, take a little time to set yourself up for success. A few simple prep steps will help you create a pantry that’s both beautiful and functional—and save you from purchasing organizers you don’t actually need.

    1. Empty Everything

    Take everything out of your pantry so you can see exactly what you have. It may seem like extra work, but starting with a blank slate makes it much easier to create a system that lasts.

    2. Check Expiration Dates

    Now is the perfect time to toss expired foods, donate unopened items your family won’t eat, and combine duplicate products. You’ll free up valuable shelf space before you even begin organizing.

    3. Clean the Shelves

    Wipe down shelves, vacuum out crumbs, and clean sticky containers before putting anything back. Starting with a fresh, clean pantry makes the finished result feel even more rewarding.

    4. Group Similar Items Together

    Sort foods into categories like baking supplies, canned goods, snacks, breakfast items, pasta, rice, spices, and drinks. You may even want to create activity-based zones for things like school lunches, taco night, or quick breakfasts.

    5. Measure Before You Shop

    This is the step that’s easiest to skip—but it can save you money. Measure the height, width, and depth of your shelves before ordering bins, turntables, or drawer organizers. A few quick measurements can prevent the frustration of buying organizers that don’t fit.

    6. Organize for Your Lifestyle

    Pinterest-perfect pantries are beautiful, but the best pantry is one that works for your family. Place everyday foods where they’re easiest to reach, keep kids’ snacks at their level if appropriate, and don’t feel like you have to decant every single item. Build a system that makes your daily routine easier—not one that’s difficult to maintain.

    *Pro Tip: Resist the urge to buy organizers before you declutter. Once you know exactly what you’re storing, you’ll be able to choose storage solutions that fit your space instead of trying to make your pantry fit the organizers.

    *Many of these organization products are favorites that I’ll be linking in my storefront, so you can easily recreate the look and functionality in your own home. Clever Pantry Organization Storefront Here

    *This post contains an affiliate link. As an Amazon Associate, I earn from qualifying purchases. This means that if you click on a link and make a purchase, I may receive a small commission at no additional cost to you. I only recommend products I genuinely love, use, or believe will add value to your home and wellness journey. Thank you for supporting my work! 


    Walk-In Pantry Organization Ideas

    If you’re lucky enough to have a walk-in pantry, the goal isn’t simply filling the shelves—it’s making every inch work smarter.

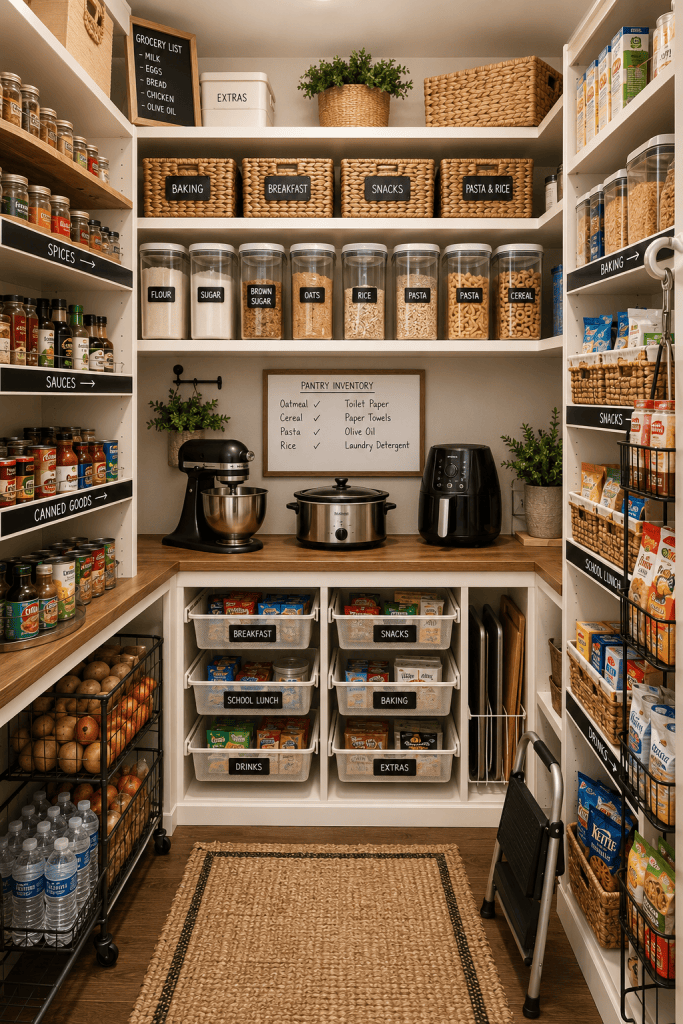
    1. Create Activity Zones

    Instead of organizing by food type, organize by what you actually do. Create dedicated stations for baking, school lunches, breakfast, snacks, or weeknight dinners. Everything you need stays together, making meal prep much faster.

    2. Add Lazy Susans to Corners

    Corner shelves love to hide things forever. Large turntables make oils, sauces, canned goods, and spices easy to reach with one quick spin.

    3. Build a Countertop Appliance Zone

    Reserve one extra-deep shelf around waist height for bulky appliances like mixers, slow cookers, or air fryers. They’re hidden away but still easy to grab.

    4. Store Heavy Items Down Low

    Large rolling wire baskets are perfect for potatoes, onions, bottled water, cooking oils, and bulk purchases. Your back will thank you.

    5. Decant Dry Goods

    Matching glass or clear containers instantly make a pantry feel organized while letting you see exactly when flour, cereal, sugar, or pasta are running low.

    6. Use Chalkboard Shelf Labels

    Paint the front edge of wooden shelves with chalkboard paint or use removable chalkboard labels so your zones can easily change as your grocery habits do.

    7. Double Your Shelf Space

    Under-shelf wire baskets make use of the empty air between shelves—perfect for tortillas, napkins, snack bags, or baking supplies.

    8. Stock Like a Grocery Store

    Place backup items directly behind the one currently being used. When the front item is empty, simply pull the next one forward.

    9. Keep a Step Stool Inside

    Hang a folding step stool on a wall hook so those top shelves become usable storage instead of wasted space.

    10. Hang an Inventory Board

    A simple dry-erase board helps everyone remember what needs replacing before the next grocery trip.

    *Clever Pantry Organization Storefront Here


    Closet Pantry Organization Ideas

    Closet pantries may be narrow, but they can hold an incredible amount with the right storage solutions.

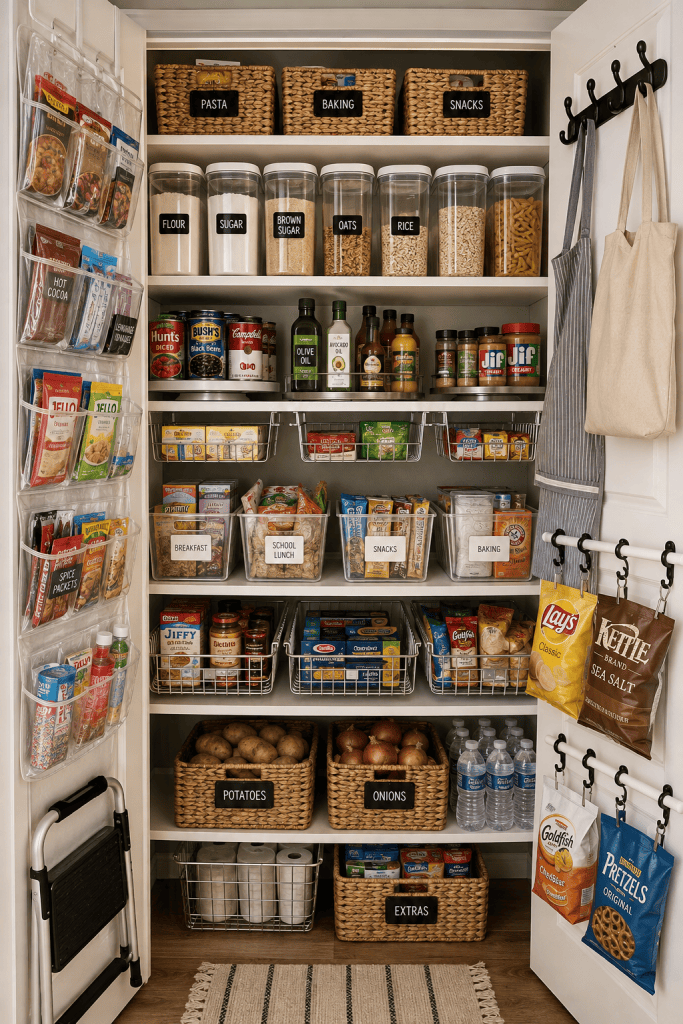
    11. Turn Your Door Into Storage

    An over-the-door clear pocket organizer isn’t just for shoes. It’s perfect for seasoning packets, drink mixes, snacks, juice boxes, and baking decorations.

    12. Organize Wraps with Magazine Holders

    Office magazine files turned on their sides create tidy homes for aluminum foil, parchment paper, and plastic wrap.

    13. Store Baking Sheets Vertically

    Tension rods placed between shelves create custom dividers that keep cutting boards, trays, and baking sheets standing upright.

    14. Hang Open Snack Bags

    Install a small towel bar on the inside of the pantry door and use curtain ring clips to hang partially opened snack bags.

    15. Add Tiered Shelf Risers

    Raise the back row of canned goods or spices so nothing gets forgotten behind taller items.

    16. Upgrade to Pull-Out Drawers

    Sliding wire drawers eliminate the dreaded “black hole” in the back of deep shelves.

    17. Simplify with Matching Bins

    Uniform storage bins instantly reduce visual clutter while keeping snacks, breakfast foods, or baking supplies grouped together.

    18. Use Every Inch of the Door

    Command hooks can hold aprons, reusable grocery bags, oven mitts, or measuring cups without taking up shelf space.

    19. Label the Shelf—Not the Bin

    Label holders attached directly to shelf edges make it easy for everyone to return items where they belong.

    20. Give Everyday Foods Prime Real Estate

    Store frequently used ingredients between chest and eye level, while seasonal or rarely used items live on the highest and lowest shelves.

    *Clever Pantry Organization Storefront Here


    Small Cupboard Pantry Organization Ideas

    Even a single cabinet can become surprisingly functional with a few smart tricks.

    21. Use Pull-Out Acrylic Trays

    Deep acrylic trays slide out like drawers, making everything in the back instantly visible.

    22. Install Stackable Can Dispensers

    Gravity-fed can organizers automatically roll the next can forward, keeping shelves neat while making inventory easy.

    23. Add Under-Shelf Jar Storage

    Install simple jar tracks beneath shelves to slide mason jars underneath, creating bonus storage without sacrificing shelf space.

    24. Mount Spice Shelves on Cabinet Doors

    The inside of cabinet doors is valuable real estate. Shallow spice racks keep seasonings visible without cluttering shelves.

    25. Try the Bread Box Trick

    Store bread, buns, and tortillas inside a dedicated bread box placed within the cabinet to prevent crushed loaves and messy packaging.

    26. Spin Your Baking Supplies

    A small Lazy Susan makes sprinkles, food coloring, vanilla extract, and decorating supplies easy to access.

    27. Create an Instant Half Shelf

    A simple horizontal tension rod can divide tall shelves into two useful storage levels without any permanent installation.

    28. Set a Snack Limit

    Designate one bin for individually packaged snacks. If the bin is full, it’s time to enjoy what you have before buying more.

    29. Stack Cookbooks Sideways

    Horizontal cookbook stacks create an elevated platform for small jars, oils, or condiments while making use of awkward cabinet height.

    30. Add Pegboard to the Back Wall

    Pegboard turns unused cabinet walls into adjustable storage for measuring cups, spoons, small baskets, and kitchen tools.

    *Clever Pantry Organization Storefront Here


    Frequently Asked Questions

    Open kitchen pantry with labeled jars containing pasta, rice, flour, lentils, and nuts on pull-out shelves

    What is the best way to organize a pantry?

    The best pantry organization system is one you’ll actually maintain. Start by grouping similar items together, then create zones based on how your family uses the kitchen. Keep everyday essentials at eye level, store heavier items on lower shelves, and use clear containers or labels so everything has a designated home.

    Should I store pantry food in clear containers?

    Clear containers aren’t required, but they can make a huge difference. They reduce visual clutter, help keep dry goods fresher, and let you see when you’re running low on staples like flour, sugar, rice, cereal, and pasta. If you’re on a budget, start with the items you use most often and add more containers over time.

    How do I organize a small pantry with very little space?

    When space is limited, think vertically. Use door organizers, shelf risers, stackable bins, Lazy Susans, pull-out trays, and under-shelf baskets to maximize every inch. Keeping only what your family regularly uses also helps prevent overcrowding.

    What should not be stored in a pantry?

    Avoid storing foods that require refrigeration after opening or ingredients that are sensitive to heat and humidity. Items like cooking oils, spices, nuts, and whole-grain flours also last longer when kept away from direct sunlight and excessive heat. Always check the manufacturer’s storage recommendations for specific products.

    How often should I reorganize my pantry?

    A quick reset once a month is usually enough to keep things under control. Toss expired items, wipe down shelves, combine duplicate products, and move older items to the front so they’re used first. A deeper clean every three to six months helps keep your pantry organized year-round.

    Are pantry labels really worth it?

    Yes! Labels help everyone in the household know exactly where items belong, making it much easier to keep your pantry organized. Whether you use printed labels, chalkboard labels, or simple handwritten tags, labeling creates a system that’s easy to maintain.

    What’s the best way to organize canned goods?

    Store canned goods together using shelf risers or stackable can organizers so every label is visible. Keep similar items—such as vegetables, soups, beans, and tomatoes—in their own sections, and place newer cans behind older ones to use the oldest items first.

    How can I make my pantry look more organized without spending a lot of money?

    You don’t have to buy expensive organizers to create a beautiful pantry. Start by decluttering, matching similar baskets or bins, removing excess packaging, labeling shelves, and using affordable storage solutions from discount stores. Even a few simple changes can make your pantry look cleaner and function much better.


    Final Thoughts

    The best pantry isn’t necessarily the biggest one—it’s the one that works for your everyday life.

    Whether you’re organizing a spacious walk-in pantry, making the most of a narrow closet pantry, or maximizing one small kitchen cupboard, these ideas can help you create a space that’s easier to maintain and far less stressful to use.

    Remember, pantry organization doesn’t have to happen all at once. Start with one shelf, one basket, or one storage solution. Small changes add up quickly, and before you know it, your pantry will feel more functional, more organized, and maybe even one of your favorite spaces.

    Happy organizing!

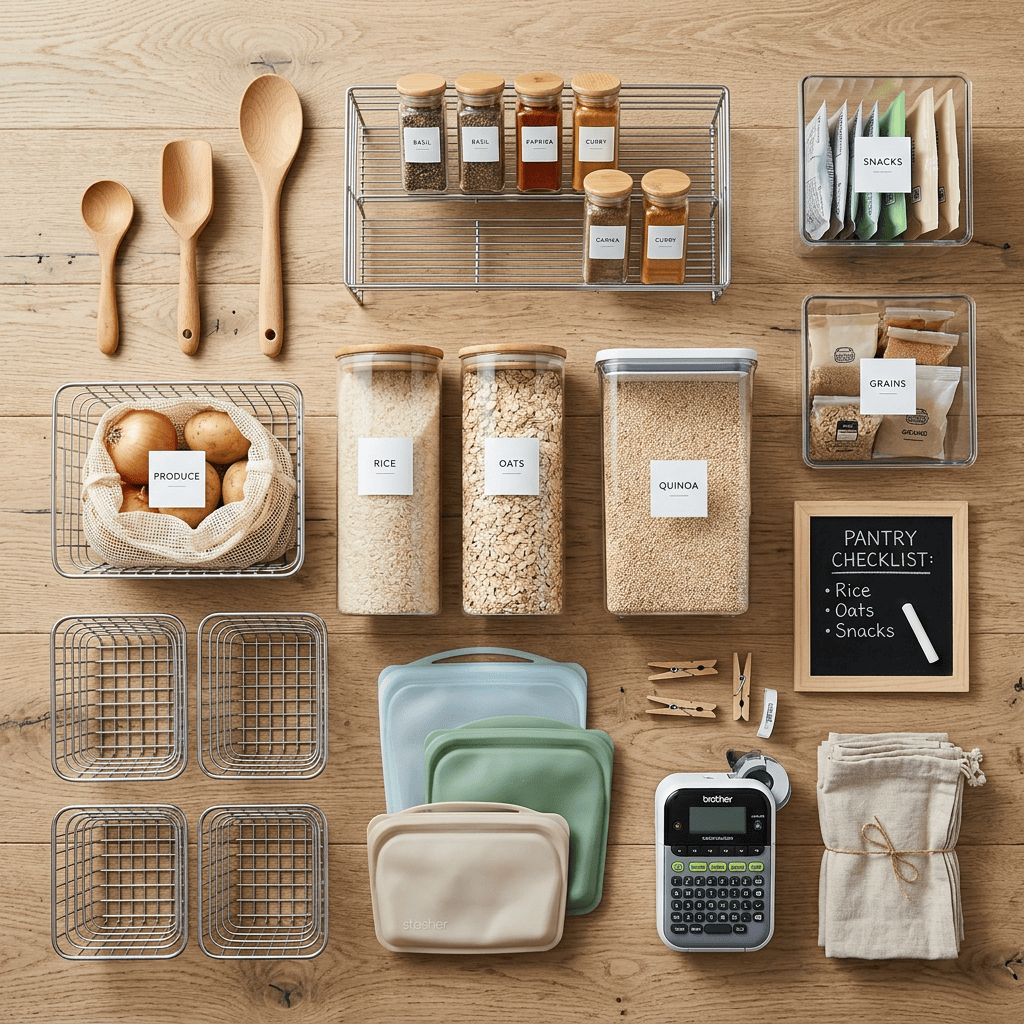
    Labeled pantry containers with rice, oats, quinoa, spices, produce, snacks, grains, and storage items
  • Heirloom Furniture: Bringing Back the Hope Chest (A Beautiful Tradition Worth Reviving)

    Open wooden chest with bonsai tree, vintage photos, books, keys, pocket watches, and letters in forest setting

    As I was cleaning out my daughter’s room recently, I found myself smiling at the little treasures tucked into every corner.

    A favorite book with a worn spine. Tiny baby shoes I couldn’t bear to part with. Birthday cards. Vacation souvenirs. A carefully curated rock collection that somehow felt incredibly important. The kinds of things that don’t belong in a junk drawer but don’t quite have a home, either.

    It reminded me of my grandmother’s hope chest.

    I remember it sitting quietly in her bedroom—a beautiful cedar chest that seemed almost magical. It held quilts stitched by hand, family keepsakes, old photographs, and pieces of a life lovingly preserved. As a child, I had no idea it represented a centuries-old tradition. I just knew it felt special.

    It made me wonder…

    Why don’t we have hope chests anymore?

    And perhaps more importantly—should we bring them back?


    What Is a Hope Chest?

    Open wooden storage chest with cedar interior in living room.

    Traditionally, a hope chest was a large wooden trunk, often cedar-lined, gifted to a young woman as she approached adulthood. Over the years, she would slowly fill it with items she would need for her future home: linens, quilts, dishes, handmade embroidery, family heirlooms, and practical household essentials.

    It wasn’t simply furniture.

    It was preparation.

    It represented hope, anticipation, responsibility, and the quiet confidence that one day a new chapter would begin.

    Long before online registries and next-day shipping, families spent years collecting quality pieces that would last a lifetime. Grandmothers embroidered pillowcases. Mothers tucked away recipes. Relatives added silverware, blankets, and cherished family treasures.

    The chest slowly became a collection of love.


    A Tradition That Spans Centuries

    Renaissance chest lid with detailed paintings of a wedding feast, procession, and intimate scenes

    The idea actually dates back to Renaissance Italy, where ornate wedding chests—called cassoni—held a bride’s valuables and dowry. As European families immigrated to America, they brought the tradition with them, where hope chests eventually became a familiar part of many homes. Depending on where you lived, they were also known as dowry chests, bride boxes, glory boxes, or even simply “the bottom drawer.”

    While the original purpose centered around marriage, the heart behind the tradition was always much bigger.

    It was about preparing someone for the future.


    Why They Feel So Meaningful

    Wooden chest filled with photo albums, letters, old photographs, a teddy bear, and personal keepsakes

    Perhaps what makes a hope chest so beautiful isn’t what’s inside it.

    It’s what it represents.

    Every object tells a story.

    Every blanket was chosen with care.

    Every handwritten recipe carries memories of family dinners.

    Every letter holds words someone hoped would still matter years later.

    A hope chest becomes a physical timeline—a bridge connecting childhood, adulthood, and future generations. It’s a place where ordinary objects become extraordinary simply because of the memories attached to them.

    In a world where so much is digital, disposable, and fast, there’s something profoundly comforting about having one place dedicated to preserving the things that matter most.


    Maybe We’ve Been Looking at Hope Chests the Wrong Way

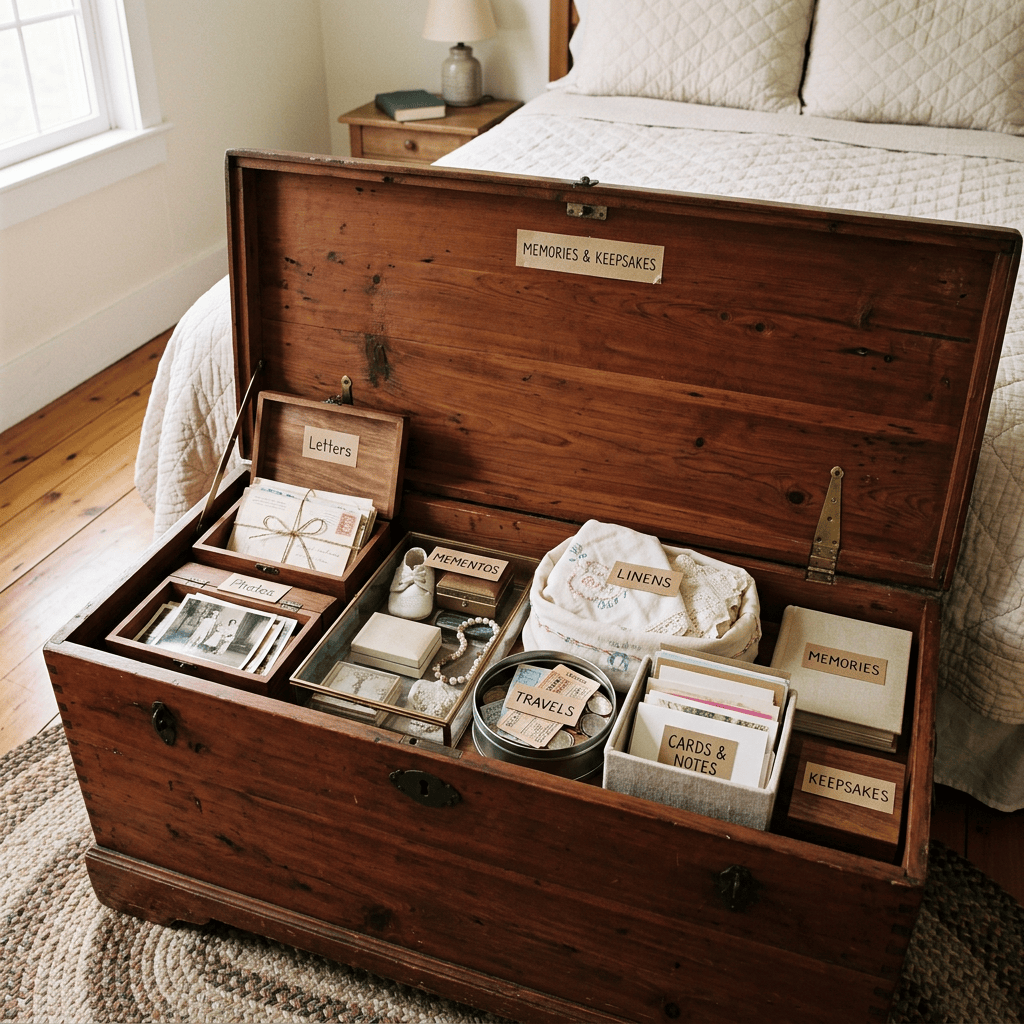
    Hope chest with organized keepsakes and containers

    One reason hope chests quietly disappeared is because society changed.

    Women no longer needed to spend years preparing for marriage in the same way, and thankfully, our understanding of adulthood has become much broader than one expected life path.

    But perhaps we threw away the tradition when we only needed to update its purpose.

    A modern hope chest doesn’t have to prepare someone for marriage.

    It can prepare them for life.

    Imagine gifting one to a teenager before graduation.

    Instead of embroidered linens, you slowly fill it with quality kitchen tools, soft towels, a cast iron skillet, favorite family recipes, a basic toolkit, first-aid supplies, and the practical things they’ll actually need when they leave home.

    Mixed among those practical items are the sentimental ones.

    Letters to open during hard seasons. (“open when…”)

    A beloved childhood book.

    Photos from family vacations.

    A favorite stuffed animal.

    The varsity jacket they can’t imagine giving away.

    Suddenly, it’s no longer just storage.

    It’s a launch kit for adulthood, tethered to a touchstone of family history.

    One of my favorite things to tuck inside a hope chest is a collection of handwritten letters. Years from now, those words may become one of the most treasured items in the entire chest. If you’re looking for ideas, I shared dozens in my article on “The Lost Art of Letter Writing: A Simple Way to Feel More Connected.”


    It Doesn’t Even Have to Be for a Teenager

    One of my favorite things about reviving this tradition is that there are no rules anymore.

    A hope chest can become a baby’s keepsake box, preserving hospital bracelets, first shoes, favorite books, artwork, and birthday cards.

    It can become a family memory chest, holding heirloom ornaments, handwritten recipes, and treasured photographs.

    It can store travel journals and souvenirs collected over decades.

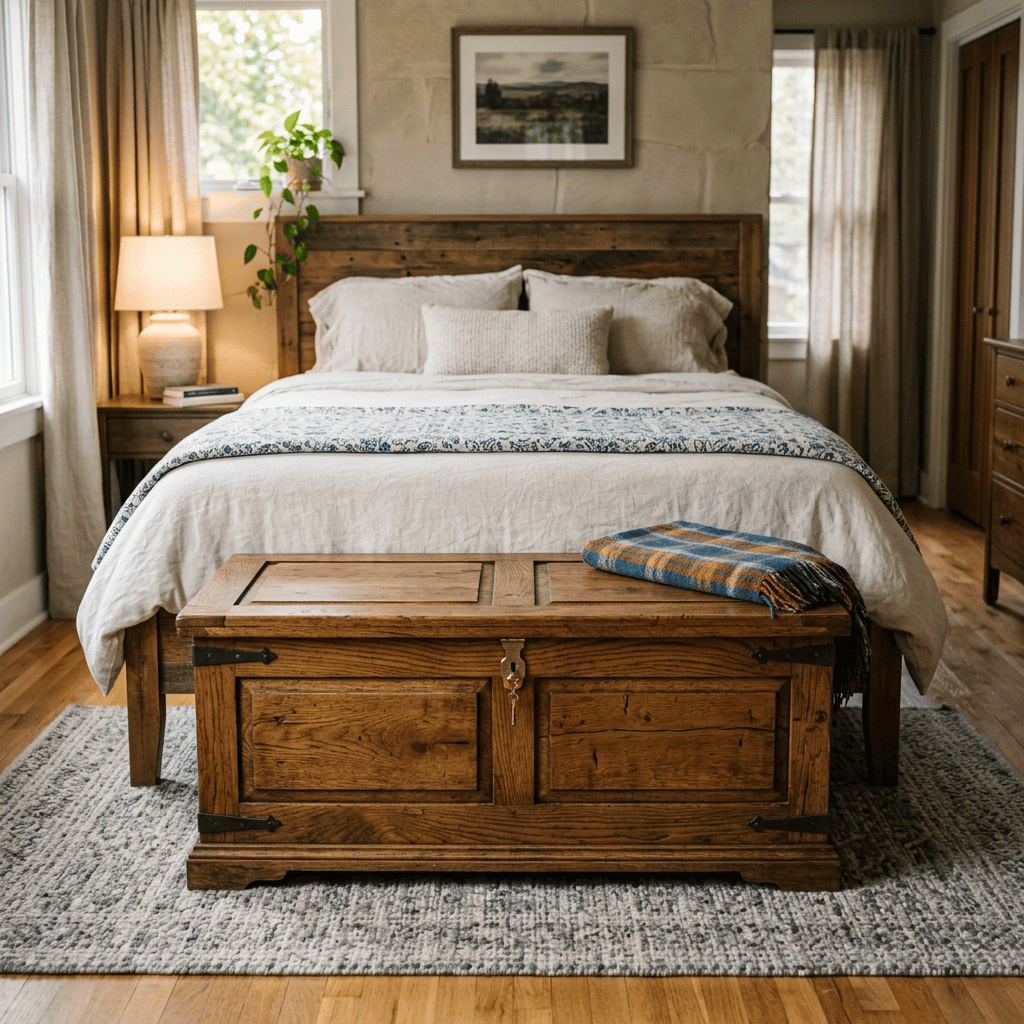
    Or it can simply become the beautiful cedar chest at the foot of your bed that quietly protects quilts, blankets, and family treasures while adding warmth to your home.

    The purpose is no longer prescribed.

    You get to decide what hope looks like.


    The Practical Beauty of a Hope Chest

    Bedroom with wooden bed, beige bedding, wooden chest with plaid blanket, bedside lamp, and houseplant

    Part of what made these chests so beloved wasn’t just sentimentality—they were incredibly practical.

    Many were built from solid hardwood and lined with aromatic cedar, which naturally helped protect fabrics from insects while allowing the chest to last for generations. Some even included locking compartments for letters, jewelry, or treasured keepsakes.

    Unlike many storage pieces today, these weren’t designed for the next move or the next decorating trend.

    They were built to become family heirlooms.

    Furniture that stayed.

    Furniture that gathered stories.

    Furniture that outlived us.


    A Beautiful Gift at Just the Right Time

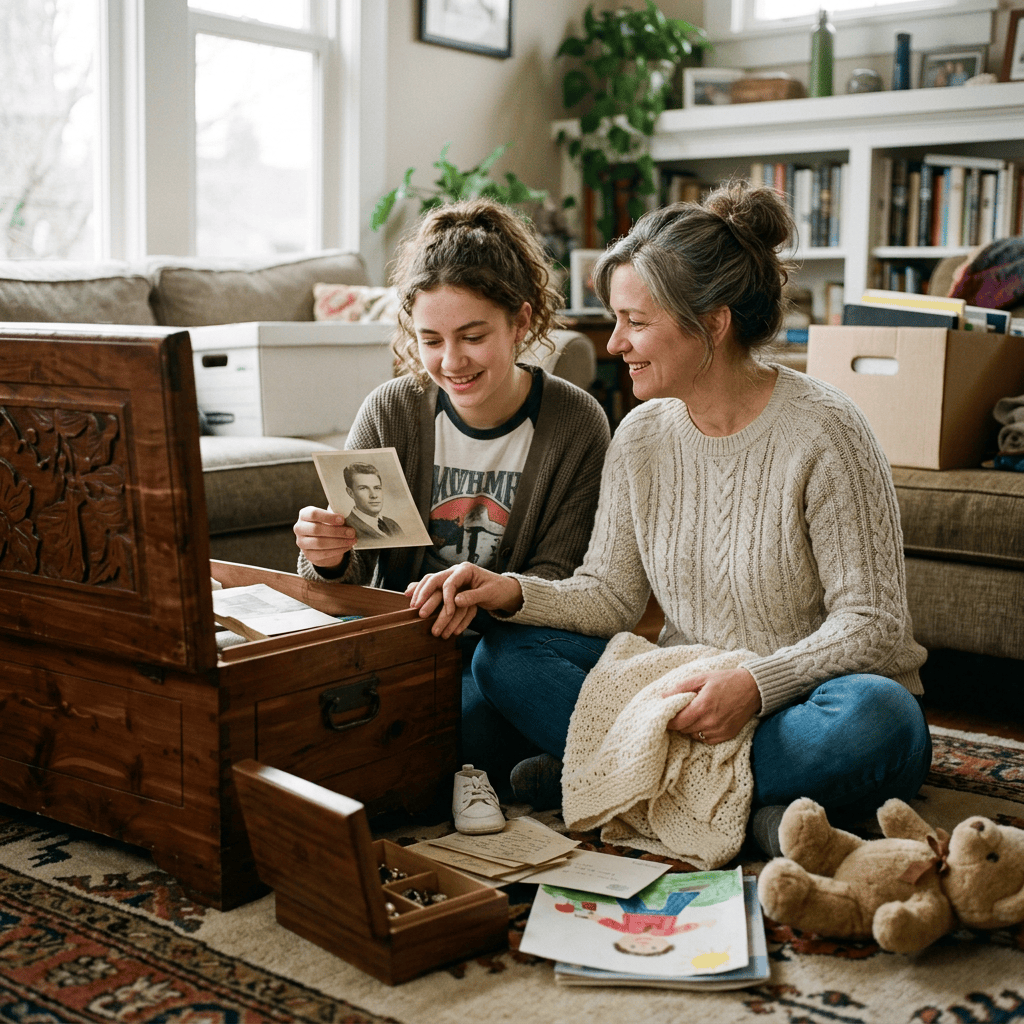
    Mom and teen organizing hope chest keepsakes

    If you’re considering starting this tradition, the sweet spot is often between ages sixteen and eighteen.

    Those years are filled with anticipation. Graduation is approaching. Independence is becoming real. Life feels wonderfully uncertain.

    A hope chest offers something surprisingly grounding during that season.

    It says:

    “You don’t have to figure everything out today.”

    “We’ll prepare together.”

    “Every birthday, every Christmas, every milestone, we’ll slowly fill this with the things you’ll need.”

    Instead of overwhelming adulthood arriving all at once, it becomes something you build toward, one thoughtful gift at a time.

    Special Letter Template:

    Here is a sample letter template designed to be given to a teenager alongside a hope chest. (In case you need some inspiration) (best handwritten)

    Dear [Name],

    There is a strange, quiet ache in watching someone you love grow up. As a parent, my greatest joy has been witnessing the person you are becoming, but it comes with the difficult realization that I cannot freeze time. I look at you now and see both the child who used to reach for my hand and the independent young adult who is preparing to step out into a vast world. Life moves in profound phases, and right now, you are standing on the threshold of your own beginning.

    To mark this transition, I am giving you this chest.

    Historically, these were called hope chests, given to young people to collect the practical tools they would need to build a future home. Generations ago, they were filled with hand-woven linens and tableware, saved in anticipation of a specific, traditional life path.

    But our world looks different now, and my hopes for you are vastly wider.

    I want you to think of this chest not as a rigid tradition, but as a modern container for your independence, your dreams, and your resilience. It is a physical anchor for your journey. As you navigate the next few years, you will fill it with the essentials of adulthood—perhaps tools for your first apartment, books that change your perspective, or utensils for a kitchen that is entirely your own. But more importantly, I hope you fill it with the invisible things: your courage, your values, and the memories of where you came from.

    The wood of this chest is strong, built to endure time and protect whatever is kept safe inside its walls. Let it remind you of your own foundation. No matter how far you travel, how challenging the world becomes, or how many times your life plans change, you carry a baseline of strength and love that cannot be shaken.

    Inside this chest, you will find a few first pieces to start your collection. But the space left open belongs entirely to your future. Step forward boldly, know that it is a beautiful privilege to watch you grow, and never forget that no matter how independent you become, you will always have a home here with me/us.

    With all my love and hope,

    [Parent/s Name]


    If this idea has you dreaming about starting a hope chest of your own, or gifting one to a loved one, I’ve put together a carefully curated collection of quality pieces for every budget that fit the spirit of this tradition. Whether you’re looking for the perfect cedar chest or storage options for keepsakes, you’ll find some of my favorite recommendations *in my storefront.

    *As an Amazon Affiliate, I may earn from qualifying purchases at no additional cost to you, thank you for supporting my work!


    Maybe What We Really Miss Is the Slowness

    Open book with sourdough bread recipes on a wooden chest with kitchen utensils

    I wonder if the revival of cottagecore, grandmacore, heirloom gardening, handmade quilts, sourdough, and slow living all point toward the same longing.

    We’re craving rituals again.

    We want traditions that connect generations instead of disappearing between them.

    We want objects that mean something.

    A hope chest asks us to slow down.

    To choose quality over quantity.

    To save instead of replace.

    To pass down instead of throw away.

    To intentionally prepare the people we love—not just with things, but with wisdom, encouragement, family history, and hope.


    A Tradition Worth Keeping Alive

    Maybe that’s why this old tradition still feels so beautiful.

    Not because we need to return to the past.

    But because some traditions deserve to evolve rather than disappear.

    A hope chest isn’t really about marriage.

    It isn’t even about furniture.

    It’s about creating a place where love is collected over time.

    Where memories are protected.

    Where practical gifts meet heartfelt ones.

    Where a young person can begin adulthood knowing they carry a little piece of home with them wherever life leads.

    And perhaps that’s something every generation still needs.

    Embroidery hoop with a stitched anatomical heart surrounded by floral designs on fabric
  • 10 Dorm Room Aesthetics That Make College Feel Like Home (Plus Easy Decor Ideas for Every Style)

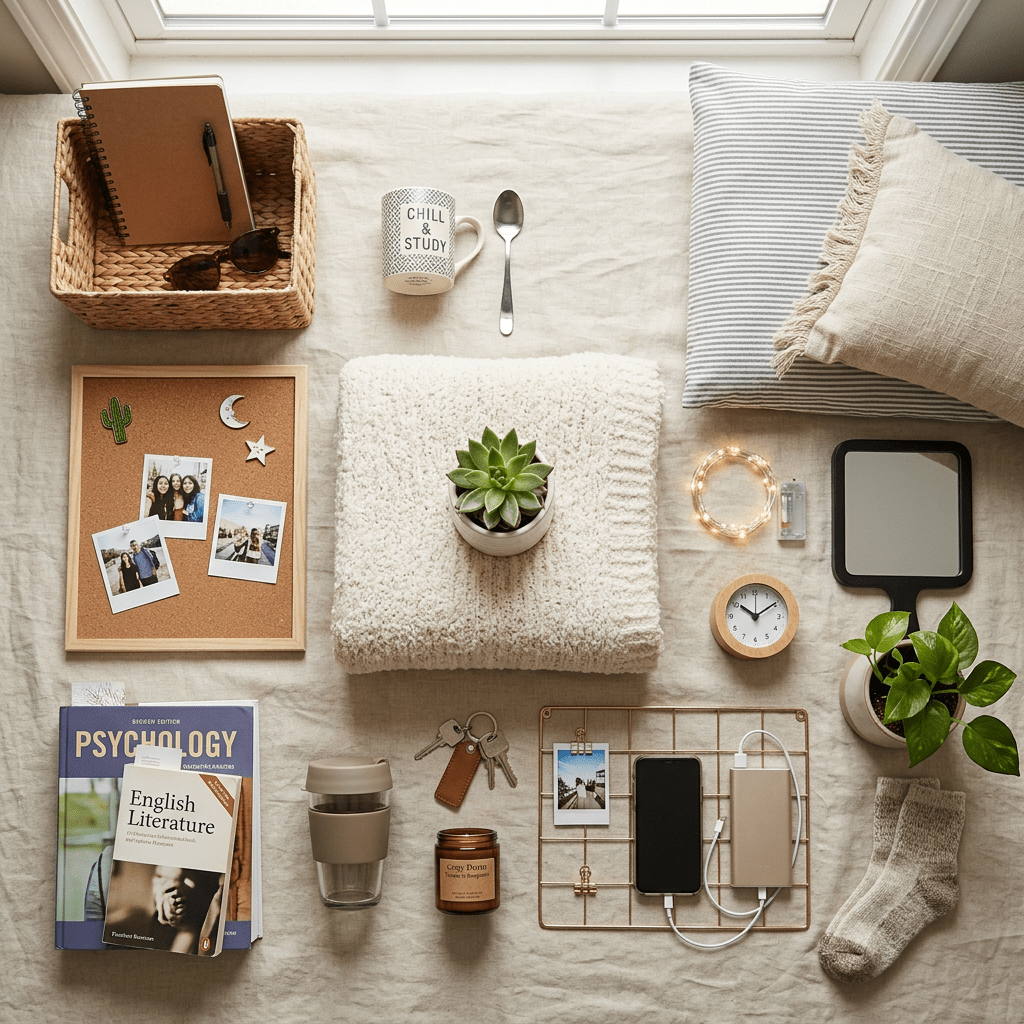
    Study and relaxation items including books, notebook, mug, plant, clock, mirror, charger, and socks on a bed

    Moving into a dorm is one of those milestones that’s equal parts exciting and overwhelming. You’re packing up pieces of your life, stepping into a brand-new chapter, and trying to make a tiny room shared with another person somehow feel like your space.

    The good news? Your dorm doesn’t have to be perfect—it just has to feel like home.

    The right room can become so much more than a place to sleep. It can be where you recharge after long classes, celebrate late-night wins with friends, study for exams, laugh until 2 a.m., and find a little peace on stressful days.

    Home isn’t defined by square footage—it’s defined by how a space makes you feel. Whether it’s your first apartment, your forever home, or a tiny dorm room, creating a space that feels welcoming, comforting, and uniquely yours makes all the difference.

    In This Guide:

    1. Preppy Coastal Aesthetic
    2. Earthy Boho Aesthetic
    3. Dark Academia Aesthetic
    4. Cozy Cottage Aesthetic
    5. Retro 70’s Aesthetic
    6. Minimalist Neutral Aesthetic
    7. Pretty in Pink Aesthetic
    8. Y2K Retro Pop Aesthstic
    9. Botanical Bliss Aesthetic
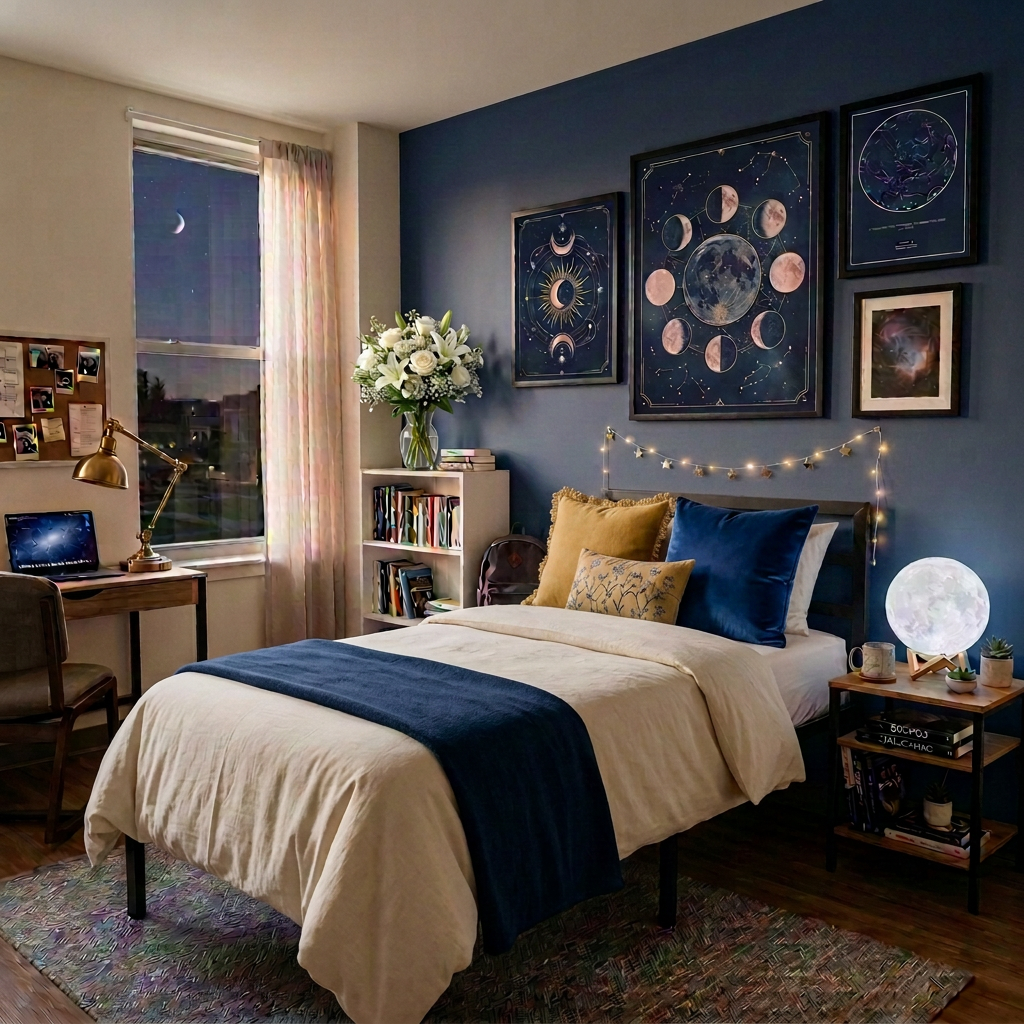
    10. Celestial Sanctuary Aesthetic

    To make decorating easier, I’ve curated each of these themes around six essential pieces that do the heavy lifting in transforming a room:

    • Bedding
    • Throw pillows
    • Throw blanket
    • Lighting
    • Rug
    • Wall art

    I’ll be linking curated collections for every theme, so whether you love hunting for decor or simply want everything in one convenient place, you’ll have an easy starting point for bringing the look together.

    Disclosure: As an Amazon Affiliate, I may earn from qualifying purchases. This means that if you click on a link and make a purchase, I may receive a small commission at no additional cost to you. I only recommend products I genuinely love, use, or believe will add value to your home and wellness journey. Thank you for supporting my work! 

    **Helpful Extras For All Themes:

    Dorm Room Assorted Lenghths Bedskirts

    Dorm Room Bed College Headboard With Adjustable Legs

    Dorm Room Bed Plush Tufted College Headboard


    How to Choose Your Dorm Room Aesthetic:

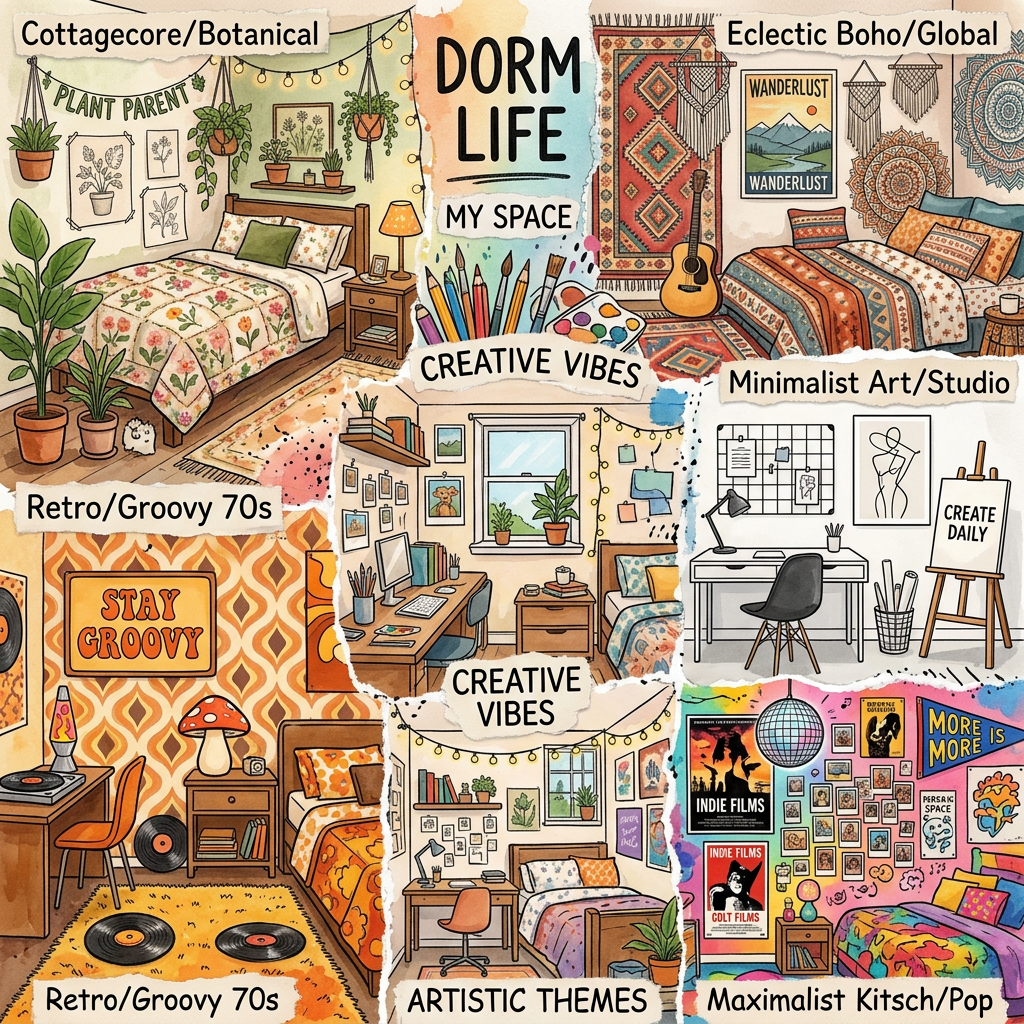
    Collage of dorm room decor styles including cottagecore, boho, retro 70s, minimalist art studio, artistic themes, and maximalist kitsch.

    With so many dorm room ideas online, it’s easy to feel overwhelmed before you even start shopping. Instead of trying to recreate someone else’s room exactly, think about how you want your space to feel.

    Ask yourself a few simple questions:

    • Do you recharge in bright, airy spaces or cozy, moody ones?
    • Do you prefer lots of color and personality, or calm, neutral simplicity?
    • Will your room be your favorite study spot, a place to socialize, or your peaceful escape after long days?
    • Which colors naturally make you feel happy, relaxed, or inspired?

    Your answers will point you toward the aesthetic that fits you best.

    Remember, your dorm room doesn’t have to be filled with expensive decor to feel thoughtfully designed. In fact, a few well-chosen pieces often make a bigger impact than trying to decorate every inch of the room.

    That’s why each of the themes below focuses on six foundational elements that instantly transform a space:

    • Bedding sets the overall color palette and becomes the focal point of the room.
    • Throw pillows add personality, softness, and layers of texture.
    • A throw blanket brings warmth while making the bed feel inviting.
    • Lighting completely changes the mood, especially in dorms with harsh overhead lights.
    • A rug defines your space, adds comfort underfoot, and makes the room feel finished.
    • Wall art tells your story and makes the room feel uniquely yours.

    Once you’ve chosen the aesthetic that feels most like you, decorating becomes much simpler. Start with these six essentials, then personalize your space over time with photos, books, souvenirs, and little reminders of home. Before you know it, your dorm won’t just be where you sleep—it’ll be your favorite place to relax, recharge, and make memories.

    Still not sure which one is you? Keep scrolling—you’ll probably know the moment you find it.


    Dorm Room Themes:

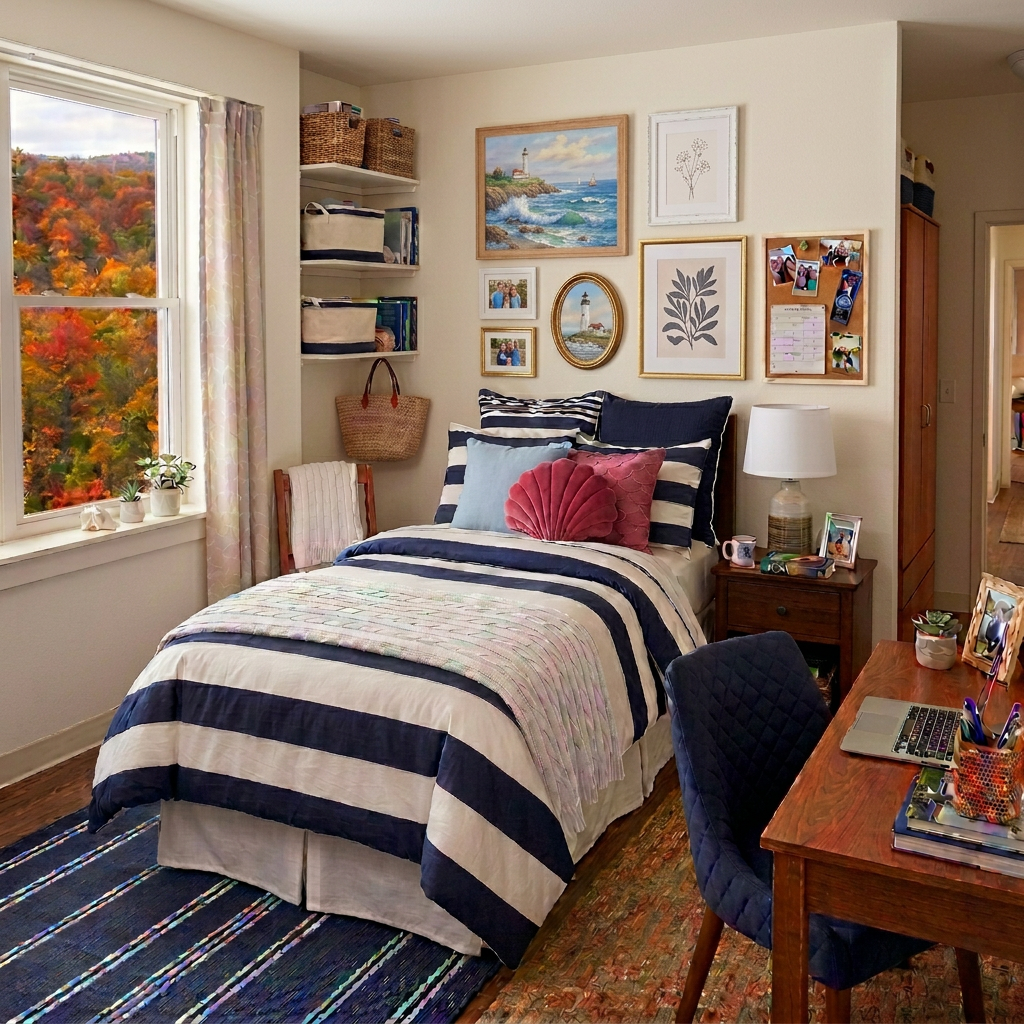
    1. Preppy Coastal

    Dorm room with navy and white striped bedding, framed beach photos, Yale pennant, and ocean view.

    Imagine walking into a room that instantly feels fresh, bright, and full of sunshine. Preppy Coastal combines crisp whites, classic navy, timeless stripes, warm wood accents, and subtle ocean-inspired details to create a space that feels polished without being stuffy. It’s cheerful, clean, and effortlessly welcoming—the kind of room that always feels tidy even during a busy semester.

    One of the best features of this style: how beautifully it opens up small spaces. Light colors reflect natural light, making even the smallest dorm feel larger, brighter, and more breathable.

    How to achieve the look

    Start with a crisp navy-and-white striped or seersucker comforter as your foundation. Layer in soft hydrangea blue or blush pink accent pillows for a pop of color, then finish the bed with a classic white cable-knit throw for texture.

    Add warmth through a ceramic ginger-jar lamp with a crisp white shade, then ground the room with a navy checkered or nautical striped rug. Complete the look with framed watercolor prints of sailboats, hydrangeas, or charming coastal towns. A few scalloped accessories, woven baskets, or natural wood accents will make the entire room feel collected and timeless.

    *Shop the Preppy Coastal Collection Here


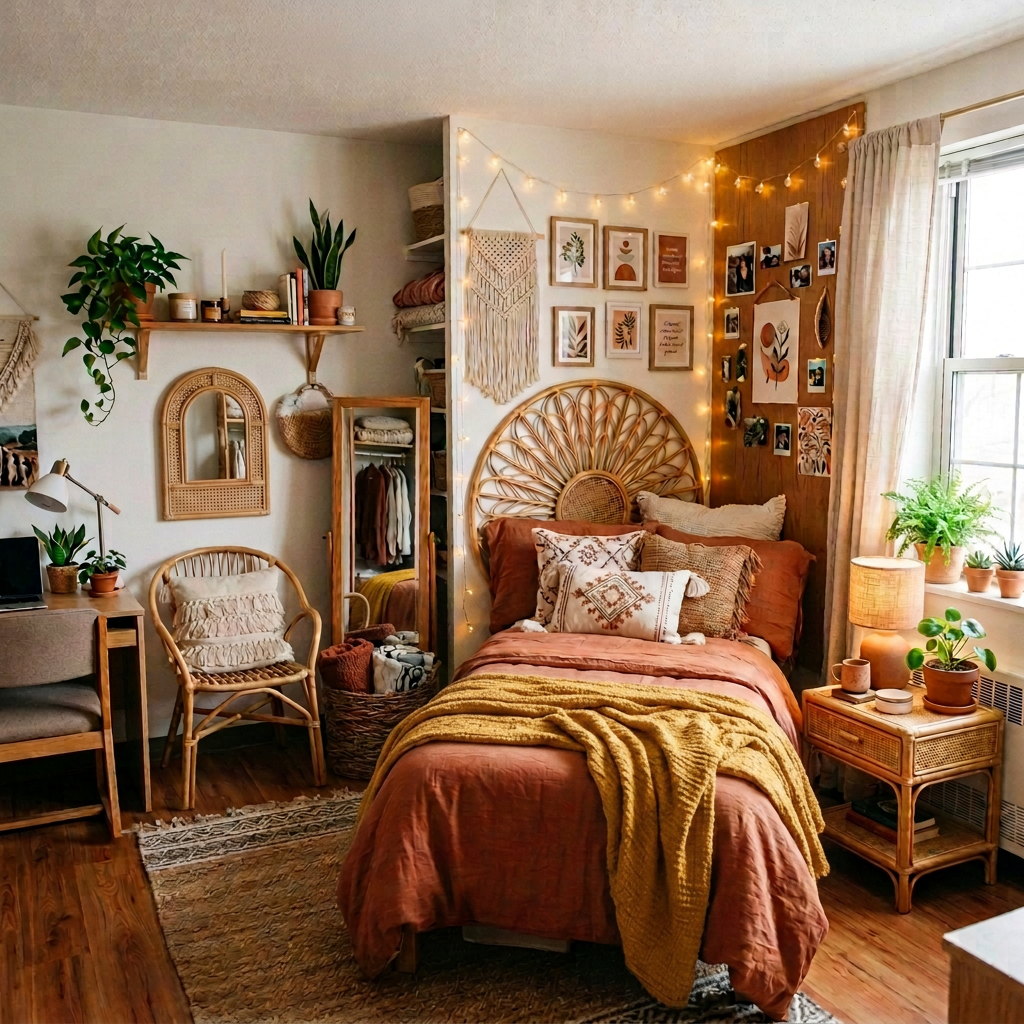
    2. Earthy Boho

    Boho-style bedroom with rattan furniture, warm orange bedding, and string lights

    Earthy Boho feels like a warm hug after a long day. Rich textures, soft neutrals, woven materials, and desert-inspired colors create a relaxed retreat that’s cozy without feeling cluttered. Terracotta, mustard, olive green, warm tan, and creamy neutrals work together to create a space that feels calm, lived-in, and deeply connected to nature.

    Why you will love it: this theme naturally creates a sense of grounding, making it easier to relax, recharge, and settle into your new routine after long days on campus.

    How to achieve the look

    Build the room around terracotta or rust-colored bedding, then layer in cream macramé or tufted pillows with lots of tactile texture. Add a camel or mustard throw blanket with chunky fringe to make the bed feel extra inviting.

    Choose lighting made from rattan, bamboo, or woven wicker to cast a soft, warm glow. Finish with a natural jute or tribal-inspired rug, abstract desert artwork, and plenty of greenery—real or faux. The more natural textures you incorporate, the more welcoming and peaceful the room becomes.

    *Shop the Earthy Boho Collection Here


    3. Dark Academia

    Young woman reading a book on a bed covered with green velvet and plaid blankets in a vintage-style bedroom with bookshelves and framed art.

    If your dream afternoon includes rainy weather, old libraries, vintage books, and a hot cup of coffee, Dark Academia might be your perfect match. Rich jewel tones, antique-inspired decor, brass finishes, and classic patterns create a sophisticated space that feels timeless, curated, and incredibly cozy.

    One of the biggest advantages of this aesthetic: it works beautifully with the standard wood furniture found in many dorms. Instead of fighting against institutional furniture, it makes everything feel intentionally curated and surprisingly luxurious.

    How to achieve the look

    Start with emerald green, sapphire blue, or burgundy bedding. Layer plaid, houndstooth, or leather-look pillows to introduce classic patterns and rich texture. Fold a wool tartan blanket over a chair or across the foot of the bed.

    Bring in a vintage-inspired brass lamp with a green glass shade for instant character, then anchor the room with a Persian-style rug full of deep colors. Complete the atmosphere with framed botanical prints, antique maps, vintage artwork, or old book pages displayed in gold frames.

    *Shop the Dark Academia Collection Here


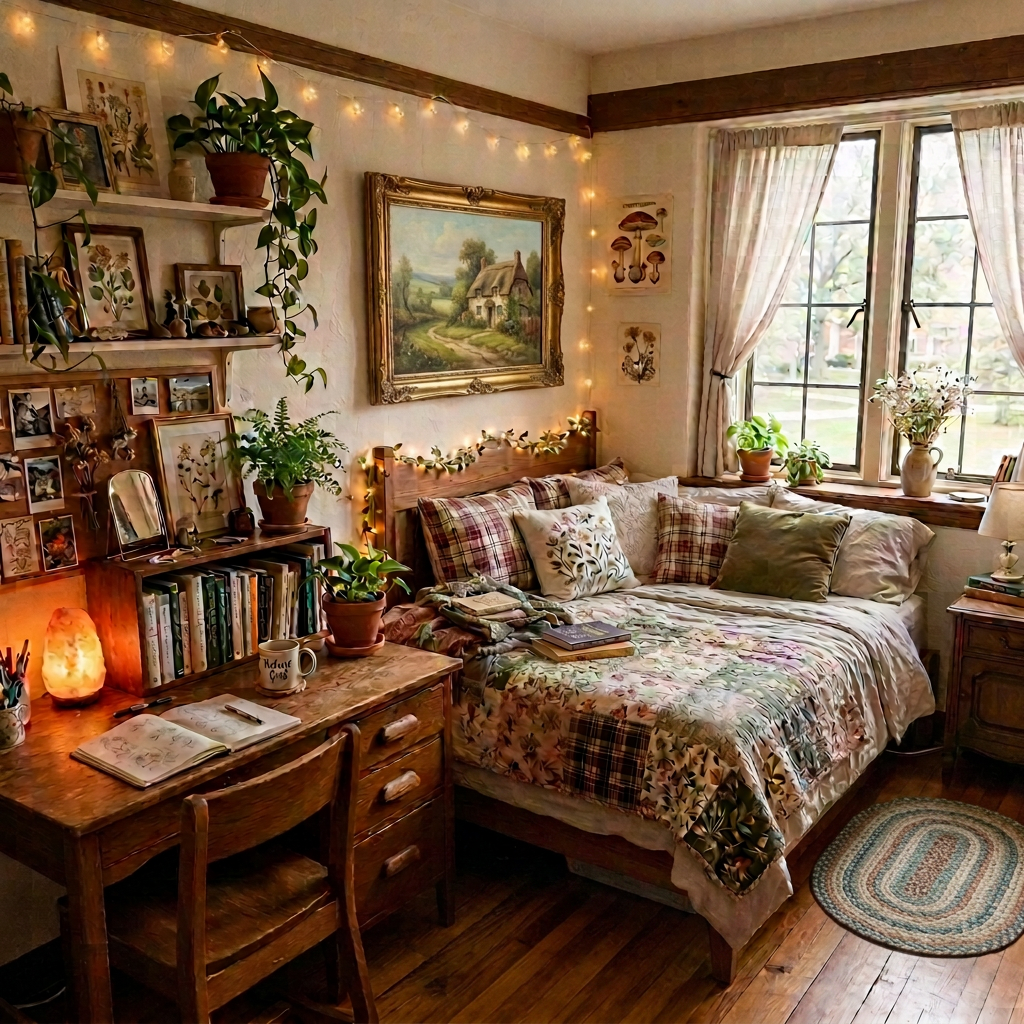
    4. Cozy Cottage

    Young woman reading on a bed with plants and nature-themed decor

    Soft, nostalgic, and full of charm, Cozy Cottage creates a space that feels warm, welcoming, and wonderfully lived in. Inspired by the comfort of a quiet countryside cottage, this aesthetic blends delicate florals, gentle gingham, natural textures, and vintage-inspired details to create a room that instantly invites you to slow down. With a palette of creamy whites, soft sage greens, butter yellow, dusty blue, and warm natural wood, every layer feels comforting without feeling overly fussy.

    Why it works so well in a dorm: the sense of familiarity and hominess it brings. College is filled with exciting new experiences, but it also comes with moments of homesickness and uncertainty. Creating a space that feels warm, peaceful, and comforting can help your dorm become a place where you truly enjoy returning after a busy day. It’s the kind of room that encourages you to curl up with a good book, call home, journal, or simply recharge before tomorrow’s adventures.

    How to achieve the look

    Start with soft floral, gingham, or subtle striped bedding in a palette of cream, sage, butter yellow, or dusty blue. Layer in eyelet, ruffled, or embroidered throw pillows for a collected, vintage-inspired feel, then finish the bed with a chunky knit or quilted cream throw blanket to add warmth and texture.

    Choose lighting with a soft glow, like a pleated fabric lampshade or a ceramic table lamp with antique-inspired charm. Ground the room with a braided natural fiber rug or a vintage-style floral area rug that feels cozy underfoot.

    The finishing touches are what truly bring this aesthetic to life. Decorate the walls with vintage botanical illustrations, watercolor landscapes, pressed-flower prints, or delicate countryside artwork in natural wood or antique brass frames. Add woven baskets for storage, a small vase of fresh or faux flowers, and a few brass or ceramic accents to create a room that feels thoughtfully collected over time rather than perfectly matched.

    *Shop the Cozy Cottage Collection Here


    5. Retro ’70s

    Dorm room with bed, couch, desk, and vintage decorations.

    If decorating makes you smile, this theme is for you. Retro ’70s is playful, colorful, nostalgic, and full of personality. Warm oranges, golden yellows, avocado greens, checkerboard prints, groovy curves, and funky textures create a room that feels energetic, creative, and impossible to walk into without smiling.

    For students who want to: instantly transform a plain dorm into a space bursting with personality and creative energy, making it perfect for anyone who wants their room to feel fun and inspiring.

    How to achieve the look

    Choose bedding with wavy retro patterns in mustard, burnt orange, and brown as your statement piece. Add round velvet pillows in rust or avocado green, then layer a crocheted chevron throw for vintage charm.

    A mushroom lamp or chrome dome desk lamp brings in iconic ’70s style, while a shag rug softens the room and adds warmth. Finish everything off with graphic typography prints, vintage record-inspired artwork, or colorful wall decor that celebrates the era.

    *Shop the Retro 70’s Collection Here


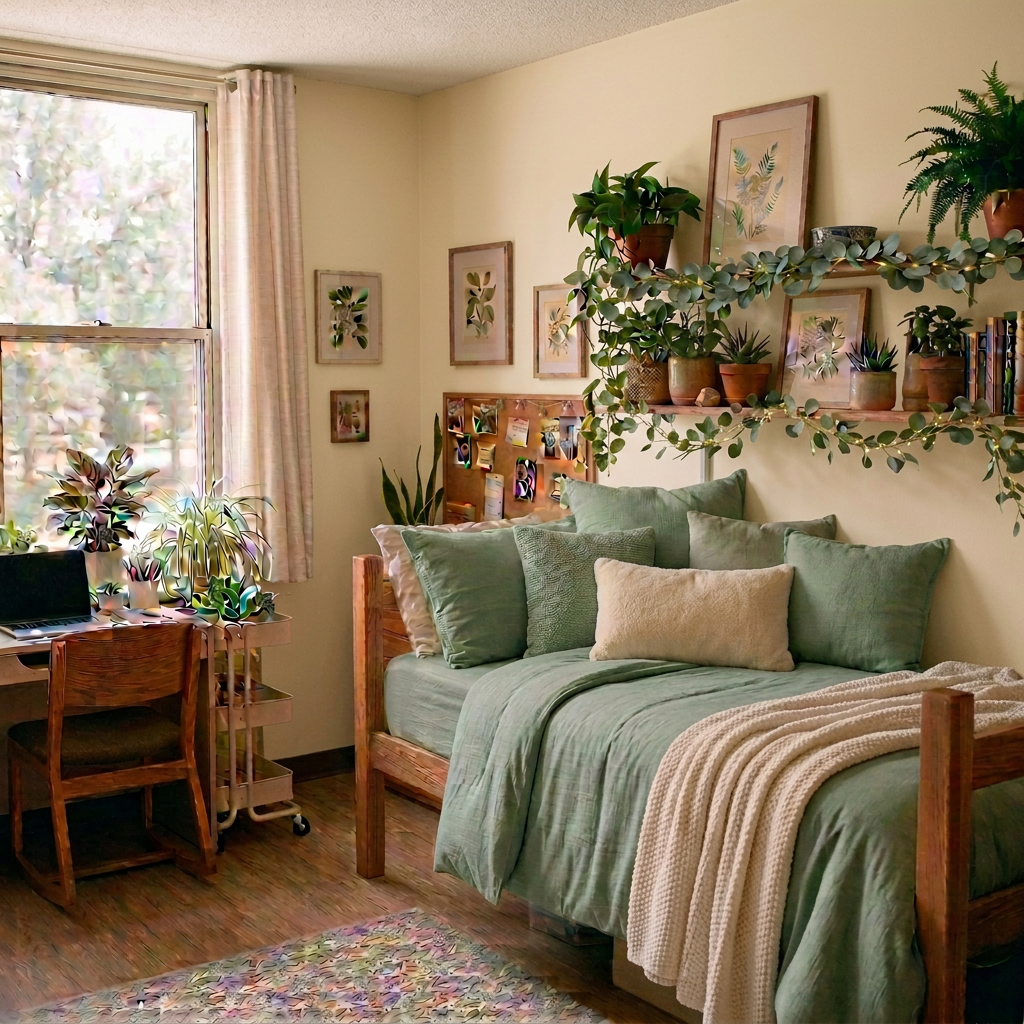
    6. Minimalist Neutral

    Cozy bedroom with bed, desk, plants, and wooden furniture in natural light.

    Minimalist Neutral proves that simple doesn’t have to mean boring. Soft whites, warm sand, oatmeal, beige, and gentle gray create a peaceful environment where every item feels intentional. The overall effect is clean, calming, and effortlessly sophisticated.

    Why it works so well in a dorm: it visually expands a small dorm room while reducing visual and mental clutter, helping your space feel more organized—and helping your mind feel a little less overwhelmed during busy semesters.

    How to achieve the look

    Start with crisp white or oatmeal bedding and layer in subtle texture using boucle or ribbed knit pillows. Add a waffle-weave or chunky knit cotton blanket folded neatly across the bed for a hotel-inspired finish.

    Choose sleek lighting with simple lines, then add a low-pile cream or jute rug to define the room without overwhelming it. Finish with minimalist line-art prints and hidden storage baskets to keep everyday essentials neatly tucked away.

    *Shop the Minimalist Neutral Collection Here


    7. Pretty in Pink

    Bedroom with pink tufted bed, floral bedding, fluffy pillows, nightstand with lamp and mug, small desk by window, and clothes rack.

    Soft, romantic, and effortlessly elegant, Pretty in Pink is all about creating a space that feels like a gentle exhale at the end of a busy day. Instead of relying on bright, bubblegum pinks, this aesthetic layers beautiful powder pinks, blush tones, dusty rose, and creamy neutrals to create a room that feels warm, peaceful, and thoughtfully curated. Plush textures, cozy fabrics, and subtle rose gold accents give the space a feminine touch while maintaining a sophisticated, grown-up feel.

    One of the greatest benefits of this aesthetic: the sense of comfort it creates. Soft colors naturally feel nurturing and calming, turning your dorm into a peaceful retreat where you can recharge, study, or unwind after long days. It feels less like a temporary dorm room and more like a cozy sanctuary that’s designed to care for you.

    How to achieve the look

    Begin with powder pink or blush bedding as your foundation, then build depth by layering several shades of pink rather than matching everything exactly. Add cream boucle, faux fur, or velvet throw pillows alongside a chunky cream knit blanket to introduce warmth and texture without overwhelming the palette.

    Choose lighting with soft white shades and delicate rose gold finishes to create a cozy evening glow. A plush cream or blush area rug helps anchor the room while adding another layer of comfort underfoot.

    To keep the aesthetic feeling elevated rather than overly youthful, choose artwork with a sophisticated touch. Think abstract blush-toned canvases, minimalist line drawings, soft floral studies, fashion illustrations, or textured neutral artwork in light wood, white, or thin rose gold frames. Finish with a few thoughtfully placed rose gold accessories—such as a desk lamp, mirror, picture frames, or decorative tray—to add warmth and polish without overpowering the room.

    *Shop the Pretty in Pink Collection Here


    8. Y2K Retro Pop

    Dorm room with pink and silver bedding, retro posters, a lava lamp, and a desk with a record player.

    Bright, bold, nostalgic, and unapologetically fun, Y2K Retro Pop celebrates the playful energy of the late ’90s and early 2000s. Think fuzzy textures, shiny finishes, smiley faces, butterflies, daisies, vibrant pinks, metallic silver, and colorful accessories that make your room feel like a celebration of your personality.

    Why you will love it: this theme naturally becomes a conversation starter. It’s the perfect backdrop for concert posters, Polaroids, favorite memories, and little pieces of home that make your dorm uniquely yours.

    How to achieve the look

    Start with bright pink satin or metallic silver bedding as the statement piece. Layer daisy-shaped or smiley-face pillows and a fluffy checkerboard faux-fur throw to add softness and playful texture.

    Bring in neon lighting or a lava lamp for instant Y2K nostalgia, then add a fluffy shaped rug beneath your feet. Finish the walls with framed magazine covers, colorful prints, CD collages, or butterfly-inspired artwork that captures the fun, carefree spirit of the era.

    *Shop the Y2K Retro Pop Collection Here


    9. Botanical Bliss

    Dorm room bed and desk surrounded by green plants and botanical prints

    Imagine stepping into your dorm and immediately feeling like you’ve escaped into a peaceful greenhouse. Botanical Bliss combines soft sage greens, natural wood tones, cozy textures, and lush greenery to create a space that feels restorative and refreshing.

    Top benefit of this theme: after long days filled with classes, assignments, and campus life, this style creates a calming sanctuary where you can truly unwind and recharge.

    How to achieve the look

    Build the room around sage green bedding with subtle botanical details, then add olive velvet or embroidered floral pillows for extra richness. Drape a chunky knit cream throw across the bed to soften the entire space.

    Wrap warm fairy lights through faux eucalyptus garlands to create soft evening lighting, then anchor the room with a woven rug in muted earth tones. Finish with framed botanical prints and plenty of plants—whether real or faux—to complete your own little indoor retreat.

    *Shop the Botanical Bliss Collection Here


    10. Celestial Sanctuary

    Bedroom with moon phase posters, star string lights, celestial pillows on bed, and a globe on nightstand

    Transform your room into an enchanting little escape. The Celestial Sanctuary theme combines the dreamy beauty of a celestial aesthetic with cozy lighting, moon-inspired decor, and rich navy and gold accents. If you love stars, constellations, astrology, Harry Potter vibes, or simply creating a peaceful nighttime retreat, the celestial aesthetic will turn an ordinary dorm into a space that feels calming and almost magical.

    One of the biggest advantages of this aesthetic: how beautifully it softens harsh dorm lighting. Warm lamps, fairy lights, and galaxy projectors create a calming atmosphere that’s perfect for winding down after busy days.

    How to achieve the look

    Start with deep navy or charcoal bedding, plain or featuring subtle celestial details like stars or moon embroidery. Layer velvet midnight-blue pillows with metallic accents or mustard yellow/gold pillows, then add a galaxy-inspired fleece throw for warmth and comfort. For a lighter look, try cream colored bedding with midnight blue accents.

    Replace harsh overhead lighting with a moon lamp or galaxy projector to instantly change the mood of the room. Add a dark textured rug beneath your feet, then finish the walls with moon-phase art, constellation prints, zodiac illustrations, or celestial tapestries that make the entire space feel dreamy and personal.

    *Shop the Celestial Sanctuary Collection Here


    Final Thoughts

    Student sitting on bed reading book with string lights and desk setup in dorm room

    No matter which theme speaks to you, remember this: your dorm doesn’t have to look like something from Pinterest to be beautiful.

    The best dorm room is the one that makes you feel comfortable, supported, inspired, and at home.

    Whether you’re drawn to bright coastal colors, cozy earthy textures, vintage charm, or dreamy celestial vibes, decorating your space is really about creating an environment that helps you thrive during one of the most exciting seasons of your life.

    Start with the essentials, add pieces that make you smile, and don’t be afraid to let your personality shine through. Little by little, that empty dorm room will become your favorite place to land after busy days on campus.

    I hope these curated collections help make decorating a little easier and a lot more fun. Wishing you an incredible school year filled with new friendships, unforgettable memories, and a space that truly feels like home sweet home.

    You’ve got this—and you’re going to do amazing.

    Hands forming a heart shape against a blurred garden background
  • Biophilic Bathroom Bliss: How to Create a Healthy, Nature-Inspired Retreat (Without a Full Remodel)

    Rustic bathroom with stone sinks, bathtub, wooden countertop, and numerous green plants

    The bathroom is one of the first places we visit every morning and one of the last places we spend time before bed. It’s where we prepare ourselves for the outside world, wash away the day, and (hopefully) find a few quiet moments in between.

    But for years, I noticed something strange.

    I would step into the shower…and instead of relaxing, I felt anxious.

    It took me a long time to realize why.

    For years, my morning shower had been the place where my brain switched into work mode. Every rushed morning, every stressful commute, every overwhelming day started in that same shower. My body had quietly learned that stepping under the water meant stress was about to begin.

    Once I recognized the pattern, I stopped thinking of my bathroom as simply a functional room. Instead, I started asking:

    How can this space help my body feel calm instead of overwhelmed?

    That question led me to the idea of biophilic design—a design philosophy centered around bringing the calming qualities of nature into our homes. Combined with cleaner materials, better organization, and a few thoughtful upgrades, it completely changed how I experience one of the most-used rooms in my house.

    The best part?

    You don’t need a luxury renovation or an unlimited budget. Small, intentional changes can make a surprisingly big difference.

    What Is Biophilic Design?

    Bathroom featuring a white sink and toilet, wooden accents, multiple green potted plants, and leafy patterned shower curtain

    The word biophilic simply means our natural connection to nature.

    Biophilic design brings elements of the outdoors inside through natural light, organic textures, plants, calming colors, flowing shapes, and sensory experiences that remind us of being outside.

    Think less “Pinterest-perfect spa” and more “a room that quietly helps your nervous system exhale.”

    When paired with healthier materials and thoughtful organization, your bathroom becomes more than a place to get ready—it becomes a place that supports your physical and mental well-being.


    One of my favorite parts of designing a home is finding beautiful, functional pieces that make everyday routines feel a little more intentional.

    If you’ve been thinking about creating a healthier, more calming bathroom, I’ve rounded up some of my favorite finds to help you get started. You don’t have to transform your bathroom overnight. Even one thoughtful change can make a difference.These are products I’ve chosen because they align with the ideas of biophilic design—cleaner materials, thoughtful design, practical organization, and simple ways to bring a little more nature into everyday life. I hope these ideas inspire you! Storefront Link Here

    *This post contains affiliate links. As an Amazon Associate, I earn from qualifying purchases. This means that if you click on a link and make a purchase, I may receive a small commission at no additional cost to you. I only recommend products I genuinely love, use, or believe will add value to your home and wellness journey. Thank you for supporting my work! 


    1. Start With Clean Air and Better Water

    Showerhead spraying water next to a tied bundle of eucalyptus leaves hanging on a stone wall

    Bathrooms naturally collect humidity, making good ventilation one of the healthiest investments you can make. (Think mold control)

    An effective exhaust fan (or opening a window whenever possible) helps control moisture, discourages mold growth, and keeps the room feeling fresh.

    Next, think about your shower.

    A shower filter can reduce chlorine and other impurities commonly found in municipal water. Many people also find filtered water gentler on sensitive skin and hair. A filtered shower head combo combines clean water and the sensory experience of a rainfall shower.

    If you’ve ever wanted your shower to feel more like a spa, consider layering in simple sensory upgrades:

    • A rainfall shower head for a softer, more immersive shower experience
    • Fresh eucalyptus hung behind the shower head. Hanging eucalyptus in the shower uses hot steam to release natural essential oils that clear respiratory airways, lower cortisol levels, and instantly transform a daily shower into a stress-reducing aromatherapy ritual.
    • A waterproof Bluetooth speaker with calming music or nature sounds
    • Waterproof Red Light Therapy Lamp for a therapuetic experience

    These ideas aren’t about creating a picture-perfect bathroom—they’re about creating a ritual your body actually looks forward to.


    2. Use Natural Materials

    Natural skincare and wellness products including soap, hand wash, body oil, toothbrush, loofah, candle, and dried eucalyptus on a wooden table

    Have you ever noticed that strong “new shower curtain smell?”

    That’s often caused by chemicals being released from vinyl or PVC products—a process called off-gassing. Heat and steam can make those odors even more noticeable in a small bathroom.

    Instead, choose natural materials whenever practical.

    Some easy swaps include:

    Need a waterproof liner?

    A non-coated PEVA liner is generally considered a better alternative to traditional PVC liners and is an easy budget-friendly upgrade. Or consider this organic cotton liner.

    Raw Wood Elements: Replace a soggy fabric bath mat with a roll-up bamboo or teak mat. It adds instant warmth. Use rot-resistant woods like Teak, Hinoki Cypress, or Cedar for bath mats, stool seats, shelving, or vanity accents. These woods release a calming, earthy scent when damp.

    *If you are changing bathroom hardware, try “living finishes” like unlacquered brass, copper, or matte black steel. Unlike chrome, which can require harsh chemical cleaners to stay shiny, living metals develop a natural patina over time and embrace the organic beauty of aging.

    *If you are repainting, consider Low-VOC Paint (mold-resistant paint rated for bathrooms to limit volatile organic compounds, satin sheen is best).

    Take away: Natural materials bring warmth and texture that instantly make a bathroom feel less clinical.


    3. Create Calm Through Organization

    Bathroom with wooden shelves, sink, and many potted green plants under soft natural light

    A cluttered countertop doesn’t just look busy—it can feel busy.

    Our brains are constantly processing visual information, and too much “visual noise” can make a room feel stressful before we even realize it.

    Instead of filling your bathroom with colorful plastic organizers, simplify.

    Try using:

    Decanting products into matching containers is one of the simplest changes you can make. It instantly reduces visual clutter while making refills easier and cutting down on plastic waste.

    A clean and organized bathroom isn’t about perfection.

    It’s about making everyday routines easier.


    4. Bring Nature Indoors

    Bathroom with copper bathtub, numerous plants, candles, wooden cabinets, and a large frosted window

    Bathrooms are one of the easiest rooms to add plants because many species actually enjoy humidity.

    If you have a window, consider adding:

    • Pothos
    • Bird’s Nest Fern
    • Snake Plant
    • Aloe Vera
    • Calathea

    Even a single plant can soften the room and create a stronger connection to nature. Place on a window sil or consider bathroom plant shelves, or plant boxes to make a “living green wall.”

    No windows?

    Don’t force it.

    A struggling plant won’t bring anyone peace.

    Instead, choose high-quality faux greenery, preserved moss art, or dried botanicals. Beautiful natural-inspired décor can still create the calming feeling you’re after.

    Nature Aromatherapy Diffuser: Place a small reed diffuser or a passive clay diffuser on a shelf with cedarwood, pine, moss, or lemongrass essential oils to mimic the scent of an outdoor forest.


    5. Rethink Your Bathroom Lighting

    Bathroom sink with mirror, toothbrushes, soap, and candles split between day and night lighting

    Lighting affects more than how we see ourselves in the mirror.

    Bright, cool-toned lighting late at night can make it harder for our bodies to prepare for sleep, while softer warm lighting creates a more relaxing atmosphere.

    The absolute best lighting for seeing your skin and doing your makeup is natural daylight, or artificial lighting that precisely mimics it.

    Whenever possible:

    • Open window coverings during the day to maximize natural light.
    • Use warm LED bulbs (around 2700K) in the evening.
    • Install dimmer switches if you’re remodeling.
    • Light a beeswax candle during an evening bath or shower for an instant spa-like feel.
    • Add a small Salt Lamp to soften the room.

    One of my favorite habits is simply making my nighttime bathroom routine quieter, dimmer, and slower.

    It’s a small change that signals to my brain that the day is ending.


    How to Balance Bright Light (day) and Warm Light (night):

    To get perfect color accuracy without harsh shadows, follow the “Triple-Nickel” Rule for your vanity bulbs.

    –Color Temperature (4800K – 5000K): Often labeled as “Daylight” or “Natural White”. Anything warmer (under 3000K) adds a yellow tint that hides skin blemishes, causing you to overapply your makeup. Anything cooler (over 6000K) washes you out and flattens skin depth.
    –Color Rendering Index (95+ CRI): CRI measures how accurately a bulb reveals true color compared to natural sunlight. Look for a CRI of 95 or above so your makeup colors look exactly the same outside as they do in the mirror.
    –Cross-Illumination Placement: Never rely solely on a single overhead ceiling light, which casts deep shadows under your eyes, nose, and chin. Instead, place two light fixtures (like sconces) on the left and right sides of your mirror at eye level to wrap your face in even, diffused light.

    **At first glance, a bright “daylight” bulb can feel sterile and anti-biophilic. However, biophilic design is actually rooted in matching the natural cycles of the sun (known as circadian rhythms).

    By framing your high-utility makeup lighting with natural design elements, you can blend the two seamlessly:

    1. Implement Circadian Smart Bulbs
    • The Concept: Use smart LED lights at the vanity that change color temperature throughout the day, just like the sun.
    • The Execution: In the morning, program the bulbs to transition to a crisp 4800K daylight setting for grooming. In the evening, dim them down to a warm, campfire-like 2200K amber glow to trigger your brain’s natural melatonin production and encourage relaxation.

    2. Diffuse Light Through Nature-Inspired Textures

    • The Concept: Nature rarely has exposed, blinding points of light; sunlight is always diffused by clouds, tree canopies, or atmosphere.
    • The Execution: Instead of bare bulbs, shield your vanity lights with frosted white glass, woven rattan shades, or perforated ceramic sconces. This softens the daylight-intensity bulbs, scattering the light evenly across your face while keeping the fixture looking organic and grounded.

    3. Build a “Green Frame” Around the Light

    • The Concept: Position plant life directly adjacent to your light sources so the illumination mimics sunbeams filtering through a forest.
    • The Execution: Place trailing plants like a Pothos or English Ivy on a shelf right above or next to your vanity mirror. Let the vines frame the sides of the glass. When the bright vanity lights switch on, they will bounce beautifully off the green leaves, making the crisp light feel alive rather than clinical.

    4. Ground the Vanity in Matte, Organic Textures

    • The Concept: Balance the high-tech gleam of a daylight LED mirror by anchoring the surrounding countertop space with heavily textured Earth materials.
    • The Execution: Place your makeup brushes in a raw, beige marble cup. Set your daily skincare products on a natural slate tray or a fast-drying diatomaceous earth mat. This rough texture counteracts the smooth glass of the mirror and the brightness of the light.


    6. Use Nature as Your Color and Texture Palette

    Natural earth palette with eight colors and hex codes inspired by nature elements

    Biophilic design isn’t only about plants.

    It’s also about creating spaces that feel like nature.

    Instead of harsh whites, cold grays, boxy shapes, and shiny plastic finishes, look toward touches of colors and textures you might find outdoors.

    Think:

    • Soft sage greens
    • Warm sand
    • Clay and terracotta
    • Weathered wood
    • River stone
    • Curving shapes
    • Natural linen
    • Matte ceramics

    Layer different textures the same way nature does:

    Smooth porcelain.

    Waffle-weave towels.

    Stone soap dishes.

    Wood accents.

    Woven baskets.

    Stone or wood bath mats.

    The result feels collected instead of manufactured—and far more calming.

    The Color Psychology of Nature: A palette anchored in nature combined with texture contrasts: “tricks” the brain into a state of outdoor relaxation.

    Rolled fabric samples labeled Forest Green, Moss, Sage, Terracotta, Ochre, and Sky
    • Calming Botanicals & Oceans: Soft moss greens, sage, or watery blues that mimic forests and rivers, which naturally lower heart rates.
    • Grounding Earth Tones: Warm sands, soft terracottas, and muted clay colors that instantly make a space feel warm and safe.

    Traditional Bathroom vs. A Biophilic Bathroom

    Traditional BathroomBiophilic Bathroom
    PVC shower curtainOrganic cotton, linen, or hemp curtain with a PEVA liner
    Plastic organizersWoven baskets and bamboo organizers
    Bright plastic bottlesAmber glass refill bottles
    Harsh white lightingWarm layered lighting
    Cold, shiny finishesWood, stone, matte ceramics, and natural textures
    No greeneryPlants or nature-inspired décor
    Visual clutterCalm, intentional organization

    You Don’t Have to Change Everything

    One of the biggest misconceptions about creating a healthier home is thinking everything has to happen at once.

    It doesn’t.

    Start with one change.

    Maybe it’s replacing a vinyl shower curtain.

    Maybe it’s adding a plant.

    Maybe it’s hanging fresh eucalyptus or finally organizing your countertop.

    Each small improvement builds on the next.

    Over time, your bathroom becomes more than a place to brush your teeth or rush through a shower.

    It becomes a space that helps you slow down, breathe a little deeper, and begin or end your day with intention.

    That’s what I want Ryne and Pixie Home to be about—not perfection, but creating homes that quietly support healthier, calmer living.
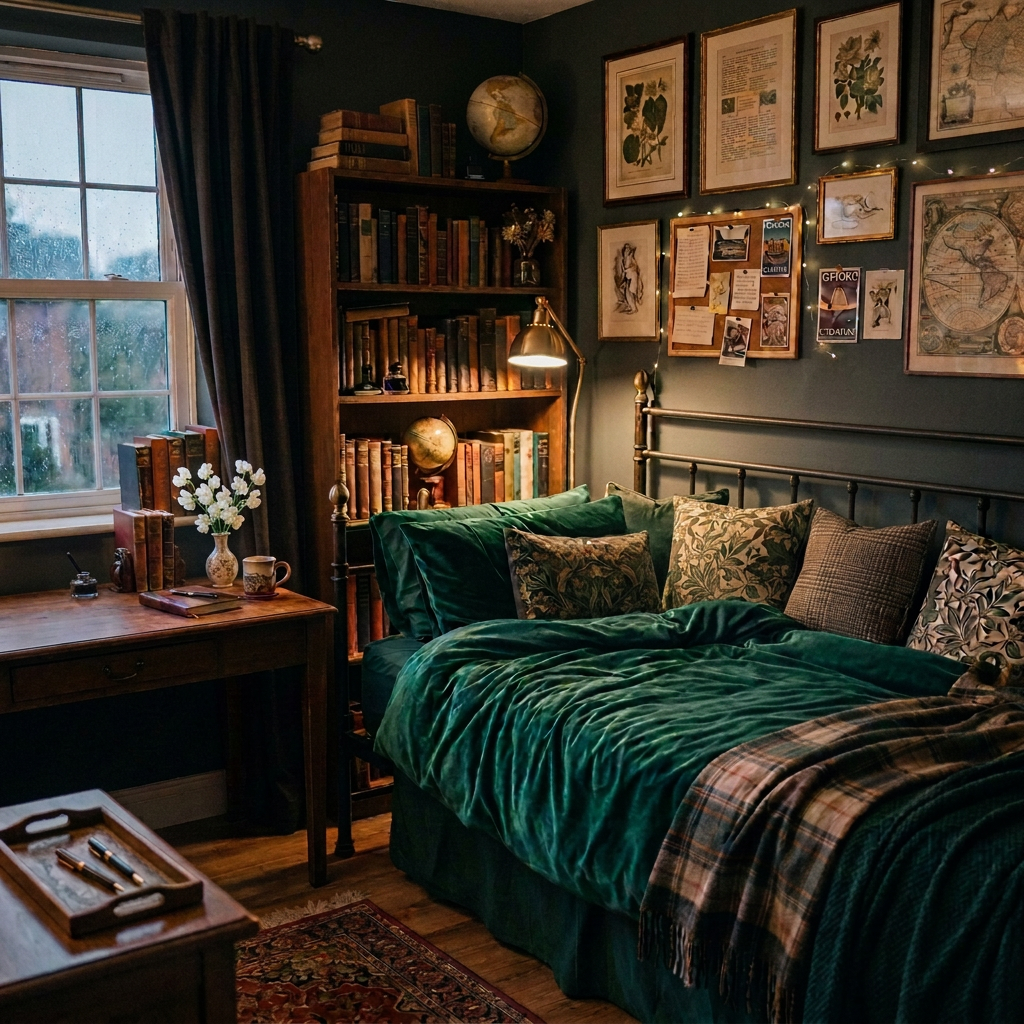

    Your Healthy Bathroom Checklist:

    ✓ Good ventilation

    ✓ Filtered shower water

    ✓ Natural, low-tox materials

    ✓ Organized surfaces

    ✓ Greenery (real or faux)

    ✓ Warm, calming lighting

    ✓ Nature-inspired colors

    ✓ Layered organic textures

    Because sometimes the healthiest changes aren’t the biggest renovations.

    They’re the small, thoughtful choices we make every single day.

    Heart-shaped wreath of white roses and green leaves on wooden table
  • 13 Ways to Reduce Toxins in the Kitchen for Better Health and Wellness

    Creating a Healthier Home, One Choice at a Time

    bright modern kitchen with white cabinets, wooden countertops, stainless steel appliances, and many green plants

    The kitchen is often the heart of the home — where meals are prepared, conversations happen, and daily nourishment begins. It’s also, unfortunately, one of the most common sources of chronic toxin exposure in modern homes.

    Reducing toxins in the kitchen isn’t about perfection or fear. It’s about awareness, informed choices, and gradual upgrades that lower your overall toxic load and support long-term health.

    This guide will walk you through:

    • Why reducing kitchen toxins matters
    • What toxins we’re commonly exposed to
    • How they affect the human body
    • Practical swaps to reduce exposure
    • What you can expect after making changes

    Why Reduce Toxins in the Kitchen?

    Most toxin exposure doesn’t come from one dramatic source — it comes from small, repeated multiple source exposures over time.

    Cooking, prepping, storing food and cleaning can introduce substances that:

    • Disrupt hormones
    • Burden detox pathways
    • Contribute to inflammation and chronic health issues
    • Impact neurological and immune health

    Reducing exposure allows your body to do what it’s already designed to do — regulate, detox, and heal more efficiently.

    ** Readers also like this related post: The 7 Elimination Pathways Learn how to support your body’s detox pathways! For more wellness content, go to: http://www.ryneandpixie.com


    Common Kitchen Toxins & Where They’re Found

    Heavy Metals

    • Lead & Cadmium – Found in many ceramics, glazes, dishware, glass, and imported cookware
    • Aluminum – Found in cookware, countertop appliances, bakeware, foil, some coffee makers

    Impact: Neurotoxicity, kidney stress, developmental concerns, hormone disruption


    Plastics & Plasticizers

    • BPA, BPS, BPF – Used in plastics, linings, food storage
    • Phthalates – Found in plastics, fragrances, vinyl
    • Microplastics – Released from plastic cookware, plastic drinkware, cutting boards, packaging, food storage

    Impact: Endocrine disruption, fertility concerns, metabolic effects


    “Forever Chemicals”

    • PFAS / PTFE (Teflon) – Found in non-stick cookware, bakeware, air fryers
    • Formaldehyde – Found in some cleaning products, paper goods, melamine plates, finishes on cabinets, flooring

    Impact: Immune suppression, hormone disruption, liver stress


    Other Hidden Sources

    • Recycled electronic waste used in plastics (think black plastic utensils)
    • Chemical detergents and cleaners
    • Synthetic sponges and paper products

    The Goal: Reduce Exposure Over Time

    Eco-friendly kitchen tools with wooden cutting board, cleaning brush, natural soap, lemons, herbs, and cast iron pan

    You don’t need to replace everything at once. Each swap lowers cumulative exposure and reduces the burden on your body. Don’t panic. Just slowly (or at a comfortable pace) replace things as you can. Start with the things that you use the most. (that non-stick egg pan you use much of the week that has scratches)

    Think progress, not perfection. As I started swapping things in my own kitchen, I realized how difficult it was to find safe options. I had to get very specific in my research due to confusing product marketing practices. If you do your own research, which I recommend, start with one category so you don’t get too overwhelmed. When shopping, look or ask specifically about the common toxins (for example, is there lead in this ceramic glaze? Are these cups made from lead-free and cadmium-free glass?) If the website doesn’t say specifically, consider skipping it or reach out to the company.

    After many, many hours of research, and personal switches and use, I have compiled a very comprehensive list of products with links for you to consider in your quest for a toxin-free kitchen space.

    *This post contains affiliate links. As an Amazon Associate, I may earn from qualifying purchases. This means that if you click on a link and make a purchase, I may receive a small commission at no additional cost to you. I only recommend products I genuinely love, use or believe will add value to your home and wellness journey. Thank you for supporting my work! Storefront Link Here


    Safer Kitchen Swaps (With Trusted Options)

    1. Non-Toxic Cookware

    Switch away from traditional non-stick and aluminum toward safer materials: Stainless steel (high quality-this matters), ceramic (be careful of ceramic coated-once they scratch, they should be thrown), cast-iron, carbon steel. I personally use stainless steel and have one durable ceramic-coated over stainless egg pan. Here are some trusted non-toxic options:


    2. Non-Toxic Drinkware

    Switch away from plastic or melamine cups to lead-free and cadmium-free glassware, high quality stainless steel, or lead-free ceramic stoneware. This category bothered me a lot. Even the type of glass you drink out of matters?? (not as obvious as my old plastic cups). A word about Wheat Straw products: unfortunately, while marketed as an earth-friendly product, I found that wheat straw can have issues with plastics and chemicals in the resin. Also, when heated, the product can leach into the digestive system and can cause gluten intolerance issues for some. Use caution. Here are some great drinkware options:


    3. Non-Toxic Dinnerware

    Surprisingly, much of the dinnerware we eat off of could do with a swap. I had melamine plates (with the cutest pattern) that I tossed immediately after finding out that melamine itself is toxic and made with formaldehyde. I was a little slower to switch my ceramic dinnerware (this felt wasteful for some reason, but needed to be done-low quality and scratched). I broke the plates with a hammer and will repurpose on a mosaic outdoor tabletop. Switch to lead-free ceramic or lead-free glass dinnerware. I use Mikasa and Corelle. The quality of the metal in your flatware matters too. Here are some safe options:


    4. Non-Toxic Cooking Utensils

    This is a huge area of toxic exposure and it is typically done every day with heat. Start to move away from any plastic utensils to chemical-free (coatings/finishes) wood, high quality (quality matters) stainless steel, and food grade, high heat tolerance silicone rubber. This was actually the first category I started with. It seemed the least daunting. I personally use all of these in my kitchen and love them all. These options are great:


    5. Non-Toxic Bakeware

    Similar to cookware, with bakeware, switch from aluminum and non-stick to stainless steel and ceramic. Actually, if you do any baking at all, these products are so much better. (truly) It almost made me a little sassy (I’m not really that great of a baker). I use the stainless baking sheets and the ceramic set. Great options here:


    6. Non-Toxic Measuring Cups and Spoons

    Again, move away from plastics here, to stainless steel, glass, stoneware, and wood. I use stainless and glass. These options are great:

    7. Non-Toxic Cutting Boards

    Let’s face it, cutting boards can get gross. If you still use plastic boards, take a good look at the wear. They can be a major source of microplastics. Both plastic and wood can be a source of bacteria growth. Stainless steel or titanium cutting boards are a good hygienic swap for meat prep. When choosing a wood cutting board for your other food prep, choose wood that has been finished with natural products and does not contain any glue or chemicals. I use stainless (meat) and Acadia wood (only for fruits, veggies, and bread). Check out these options:

    *Pro tip: To avoid bacteria in your wood cutting boards, wash them immediately with hot, soapy water, sanitize with 3% hydrogen peroxide or white vinegar, and let them air dry completely. Because wood is naturally porous, always seal it with food-safe mineral oil to keep moisture out.


    8. Non-Toxic Coffee Machines

    I cried when I realized how long I had been drinking coffee that had been ran through a black plastic basket. YEARS. I then decided to get a stainless steel French Press, which is amazing. But then, I started adding up the monthly coffee bill for the “fancy” coffee drinks my family gets and decided to make an investment in an espresso machine. Life. Changing. Paid for itself in under 6 months. The machine I use has stainless steel internal parts and the very small amount of plastic exposure is BPA-free. My drinks have never been so frothy, so delicious! Options here:
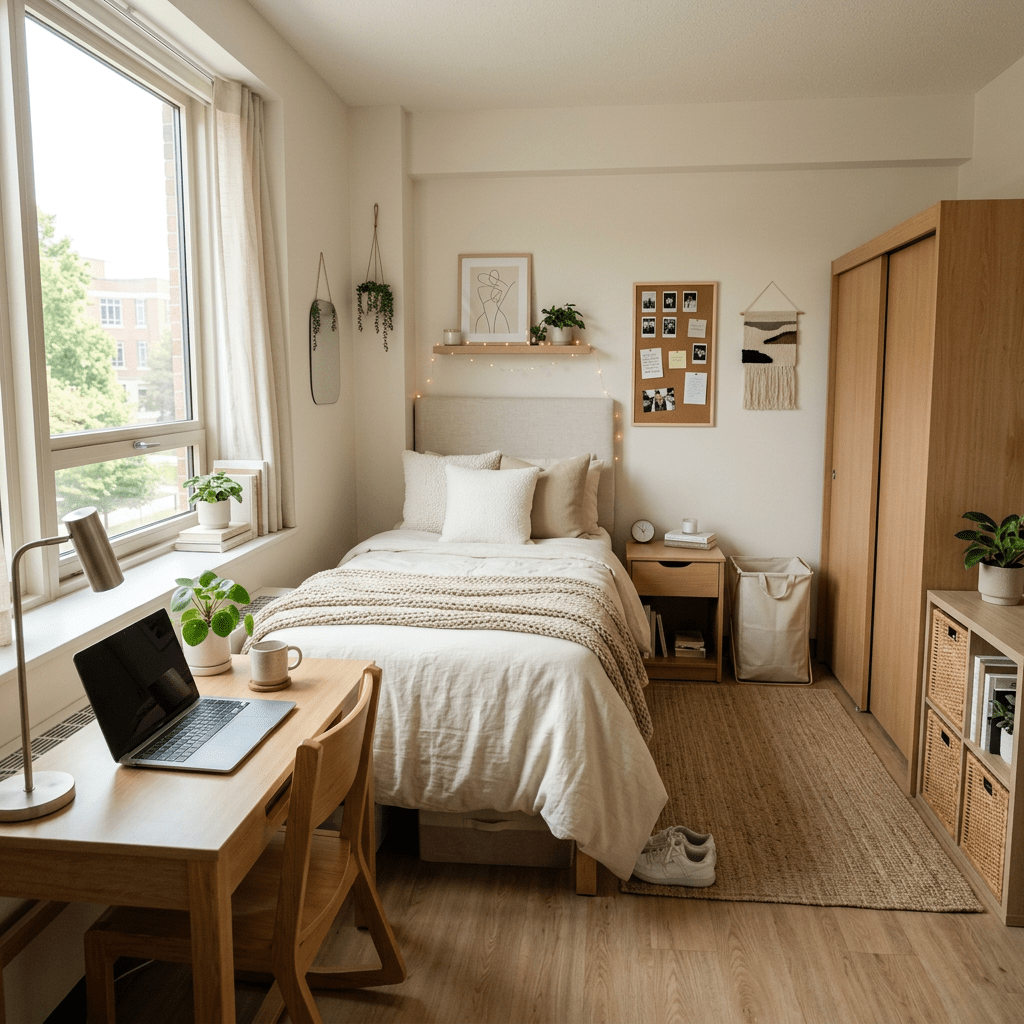
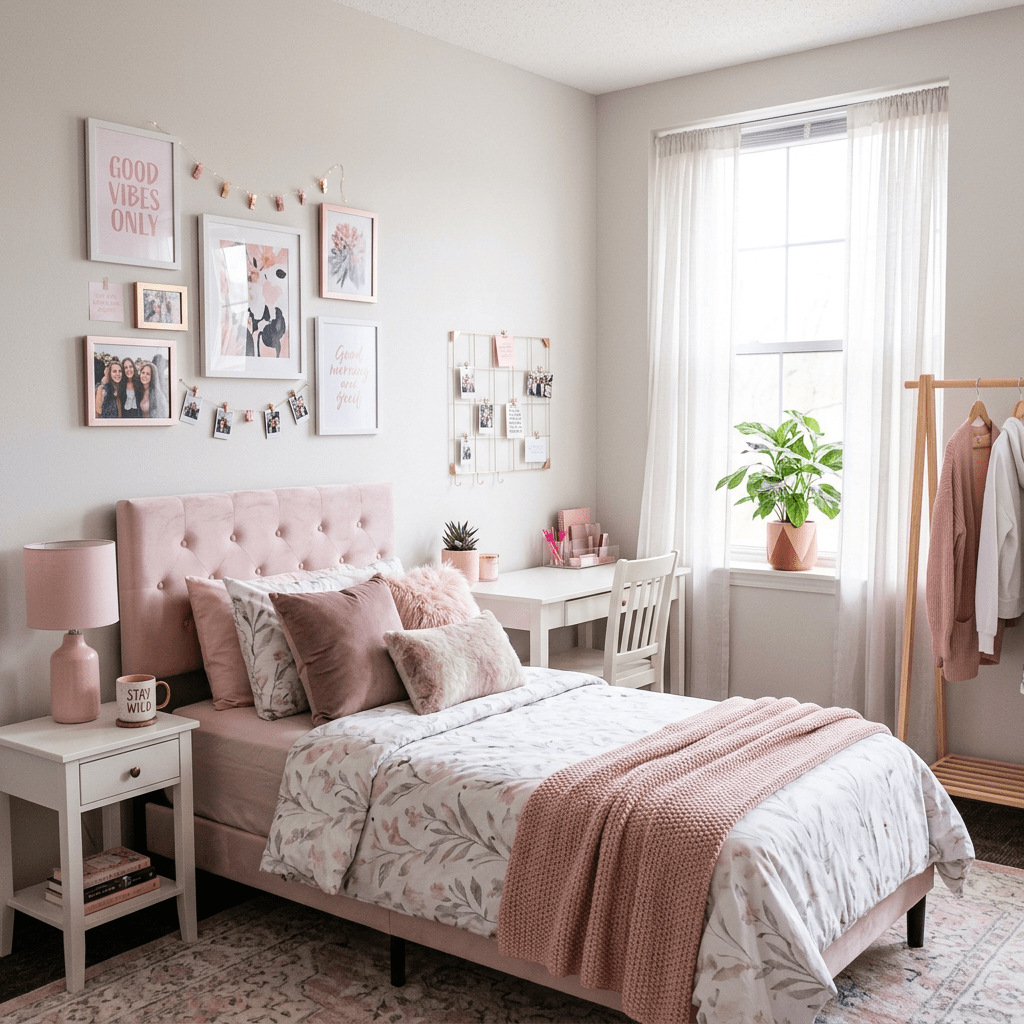
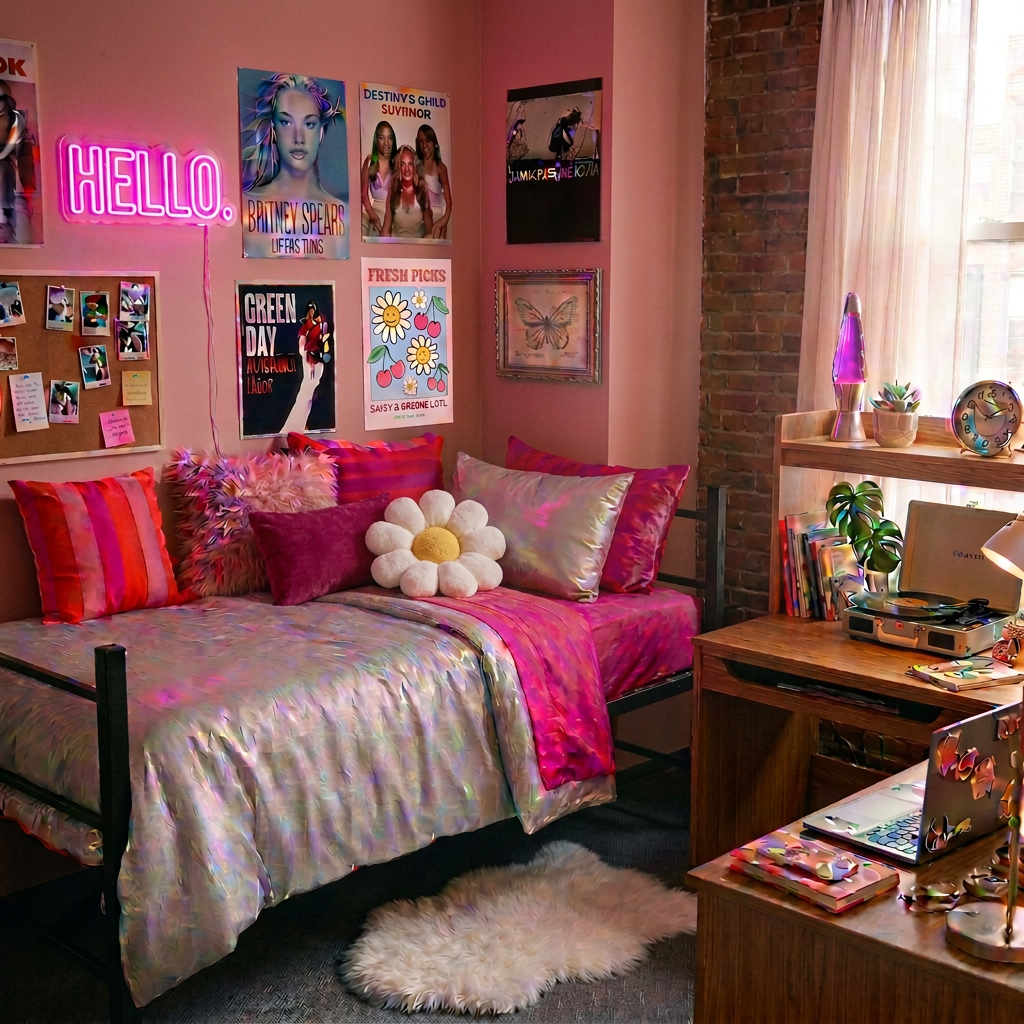
    9. Water Filtration

    Filtering city (tap) water is important to reduce exposure to things like chlorine, lead, pesticides, endocrine disrupters, viruses, and bacteria. This is actually a BIG DEAL. The gold standard of water filtration is reverse osmosis (RO). RO is an advanced water purification technology that forces water through a semi-permeable membrane using pressure to remove contaminants, ions, and molecules. By reversing the natural osmotic process, it separates dissolved salts, minerals, and bacteria, producing purified water. Many people living in cities choose to drink bottled water, most of which is held in plastic containers. It is worth considering filtration options. Full disclosure: I have well water that we have tested yearly, so this has not been an issue for me, for which I am grateful. Below is a top-rated, high-performing, affordable option to check out:


    10. Non-Toxic Food Storage

    Swap plastic food containers for glass, stainless steel, and silicone. I use glass with silicone because I like to see what is in the container. Here are some useful options:


    11. Safe Appliances

    Switch away from countertop appliances with non-stick coatings, plastics, and metals that can leach contaminants like aluminum, lead, and cadmium. (heating elements and cheap coatings) Here are some amazing options my family uses:


    12. Natural Cleaning Products

    This is an area that is really hard to find TRULY NON-TOXIC products. If you feel inspired, making your own cleaning products with things like baking soda and vinegar, is easy and recipes are abundant online. If you need proven performance and convenience, these are the real deal:


    13. Towels, Sponges & Paper

    Try for organic, natural fibers, unbleached. I admit, I am a paper-towel-aholic, so I am working on being more aware of my usage and try to use only for really big, gross messes. I also taught myself how to loom knit (super easy/fun) organic cotton scrubbies, so I use those a lot, as well as items below:


    What to Expect After Making These Changes

    Making your kitchen space non-toxic leads to significantly reduced exposure to environmental toxins. Many of these changes are an investment not just in products, but your long-term health. Many people notice:

    • Reduced headaches or sensitivities
    • Improved digestion
    • Fewer inflammatory symptoms
    • Better hormonal balance
    • Reduced allergies
    • Improved skin health
    • A calmer nervous system

    Changes are often subtle but cumulative, supporting long-term health and resilience.


    A Gentle Disclaimer

    This information is educational and not intended to diagnose or treat medical conditions. Everyone’s body and tolerance level is different. Choose what feels manageable for your life and circumstances.


    Final Thought

    So many of your health choices are made in your kitchen. Detoxifying this space creates a foundation for health to thrive. Each conscious choice is a vote for your well-being that brings peace of mind.

    A healthier kitchen supports a healthier home, a healthier family, a healthier body — and over time, a healthier life. Happy cooking! Happy gathering!


  • 6 Steps to Creating a Cozy, Nurturing Bedroom Environment For Better Sleep and Wellness

    Your bedroom should be more than just a place to sleep — it should be a sanctuary where your mind and body can fully rest, recharge, and heal. With the right elements, you can turn an ordinary room into a cozy, nurturing, and health-centered oasis that promotes better sleep, reduced stress, calm nervous system, and overall wellbeing.

    In this guide, we’ll explore practical ways to improve your bedroom environment and recommend curated products I use that combine comfort, health benefits, and style. Links have been posted for your convenience.

    *This post contains affiliate links. As an Amazon Associate, I earn from qualifying purchases. This means that if you click on a link and make a purchase, I may receive a small commission at no additional cost to you. I only recommend products I genuinely love, use, or believe will add value to your home and wellness journey. Thank you for supporting my work! My Storefront Link Here


    1. Start With Better Air Quality

    Cozy bedroom corner with armchair, air purifier on wooden side table, and multiple indoor plants near a window

    Good air quality is essential for deep, restorative sleep and overall health. Poor airflow or indoor pollutants can cause congestion, irritation, and fatigue.

    *Tip: Place an air purifier near your bed to cleanse the air of allergens, dust, and pet dander.

    Shop this HEPA Air Purifier on Amazon — A powerful HEPA air purifier that helps reduce airborne pollutants and keeps your sleeping environment fresh and clean.

    Plants for better air quality:

    • Snake Plants – oxygenates at night
    • Spider Plants – filter air toxins often found in mattresses, paint, and flooring (xylene, formaldehyde)
    • Peace Lily – adds humidity and filters VOCs (ammonia, benzene, formaldehyde)
    • Bamboo Palms – increase humidity and filter air toxins
    • Golden Pothos – filters toxins (formaldehyde, xylene, benzene)
    • English Ivy – filters airborne mold
    • Rubber Plant – filters formaldehyde

    2. Choose Non-Toxic, Supportive Bedding

    Bed with beige, white, and green bedding, pillows, bedside lamp, and slippers

    Your mattress. pillows, and sheets are the foundation of comfort. They should support your body while also being free of harmful chemicals.

    Eco-Friendly Mattress:
    Check out this Toxic-Free Mattress on Amazon — Designed without harmful toxins, it provides excellent support and peace of mind. Mattresses made with toxic materials can off-gas for a long time.

    Soft, Breathable Sheets:
    These Linen Sheets from Amazon are breathable, hypoallergenic, antibacterial, temperature-regulating, long lasting, luxurious and temperature-regulating–keeping you cool in warmer months and cozy when it’s chilly. Linen is a high frequency (energetic vibration) fabric that harmonizes with the body (this is a rabbit hole worth going down).

    Organic Cotton Grounding Sheets-These have been a game changer for me. I sleep so much better! I keep it under my regular sheets.

    20×26 Organic Pillow with 100% Organic Cotton Pillowcase and Shell – Soft Non Toxic and Breathable Pearl Filling, CPSC Certified 


    3. Create a Soothing Sleep Atmosphere

    Cozy bedroom with beige walls, wooden bed, white bedding, and multiple green plants

    A calming environment sets the stage for better sleep. Layered soft textures, peaceful sounds, and dim lighting all play a role. (think textures, light, sound)

    Add Texture and Warmth:


    This Luxury Faux Fur Throw on Amazon instantly elevates your bedroom’s coziness factor. (fury texture)

    Chunky Cable Knit Throw Blanket Lightweight Beige 100% Organic Cotton Blanket (soft, fluffy texture)

    Chunky Knit Blanket – Luxury Soft Cozy 50 * 60 Throw Blanket,100% Woven Blanket Rope Knot Throw Blanket (sturdy all natural material)

    Relaxing Soundscape:


    This Sound Machine on Amazon helps mask distracting noises with white noise and nature sounds — perfect for deep sleep and focus.

    Gentle Ambient Lighting:


    Amazon Salt Lamp — A soft, warm glow that delivers a calming ambiance and can be a natural nightlight alternative. Filters dust, pollen, and pollutants out of the air (hygroscopy). Negative ions emitted from salt rocks can improve mood, increase energy, and are protective from electronic pollution. Each lamp is unique!

    Hatch Restore 3 Sleep System | Sunrise Alarm Clock, Bedside Lamp & Sleep  helps you create a bedtime routine so you can fall asleep easier and faster.

    670nm Red Light Bulb by Gamma – Sleep Therapy – Melatonin Promoting Natural Sleep Aid


    4. Block Out Light for Deeper Sleep

    Tranquil bedroom with blackout curtains, salt lamp, sound machine

    Light pollution can interrupt your circadian rhythm and make it difficult to fall (and stay) asleep.

    Blackout Curtains/Shades:
    These Blackout Curtains on Amazon block out sunlight and street lights, creating a dark, sleep-friendly room that helps you fall asleep faster and sleep longer.

    Blackout Roller Shades for Indoor Windows, Pull Down Roller Blinds Cordless, Linen Fabric, Thermal Insulated UV Protection Shades


    5. Create a Cozy Reading or Relaxation Corner

    Person sitting in a cozy armchair reading a book in a small attic room with bookshelves and plants

    Not all bedroom time has to be sleep time. Having a favorite comfy spot can make your room feel more nurturing and personal. A perfect spot to relax, read, journal, snuggle with pets, listen to music, take a nap, or sip a cup of tea.


    This Cozy Chair for Relaxation is perfect for reading, meditating, or just unwinding before bed.

    Natural Wood Side Table, sustainably sourced hold your books or tea

    Floor Reading Lamp use soft, warm bulbs

    Soft, Cozy, Beige Round Rugs for Bedroom define the space with a textured rug


    6. Keep Things Calm, Clean, and Minimal

    Bedroom with beige bedding, wooden furniture, and natural light from window

    A cluttered room can lead to a cluttered mind. A peaceful space supports a peaceful mind.

    This minimalist mindset helps reduce stress and allows your brain to associate your bedroom with rest and relaxation.


    Final Thoughts: Transform Your Bedroom Into a Health-Focused Sanctuary

    Creating a cozy, healthy bedroom doesn’t have to be expensive or complicated. With thoughtful choices — from non-toxic bedding and air purification to sound management and cozy décor — you can build a space that truly nurtures your body and soul.

    *Start small, choose what matters most to you, and enjoy the journey to better sleep and deeper rest.

    Minimalist bedroom with white linens, beige armchair, wooden floor, and large windows